1. quickParent Uploader (Desktop)
The quickParent Uploader (qp Uploader) is the desktop program that a school installs first. This program converts, encrypts and uploads your SAMS data to the online data repository that populates the qp mobile application on your parents’ mobile phones. It runs continuously in the background reading the SAMS data file from ‘time to time’ and uploading any comparative changes to the online data store.
Download, Install & Run
Download
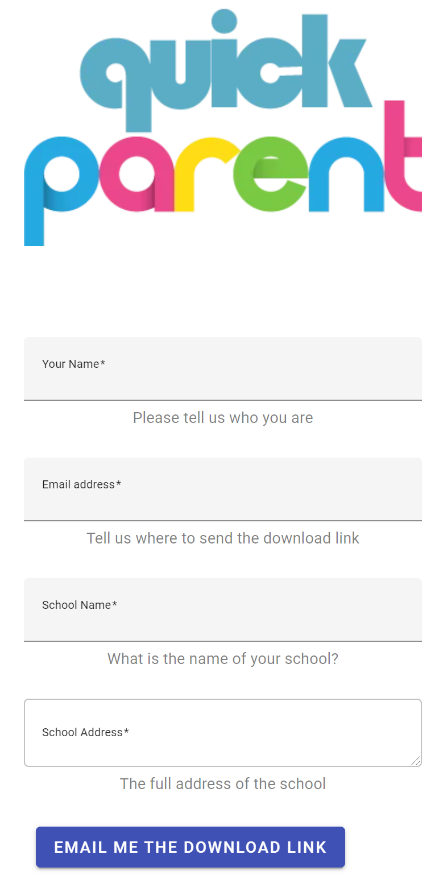
To download the app, go to Download QP School app Installer – quickParent (quickparentapp.com) and enter your details in order to receive a link to the email:

Click the link in the email you receive in the email account that you provided.
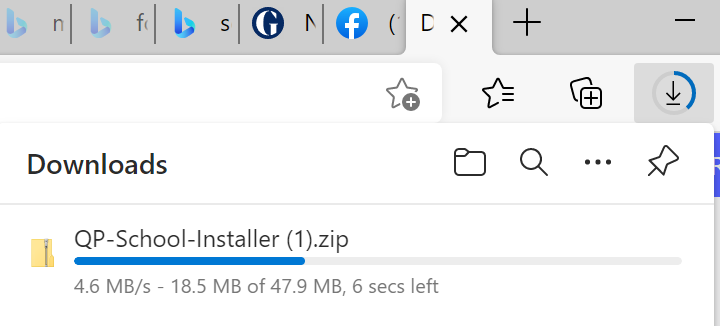

The file will download then go to your downloads folder and extract the .exe install file from the zip file.
Install

![]()
Run the install file.
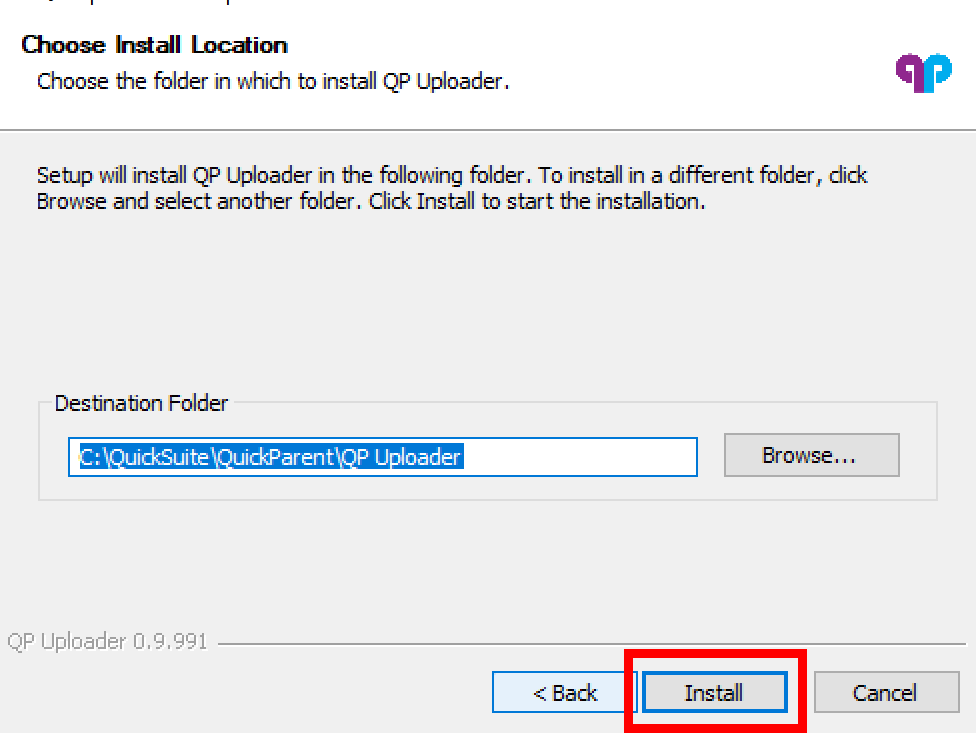
It is recommended to leave the default install location as they are.
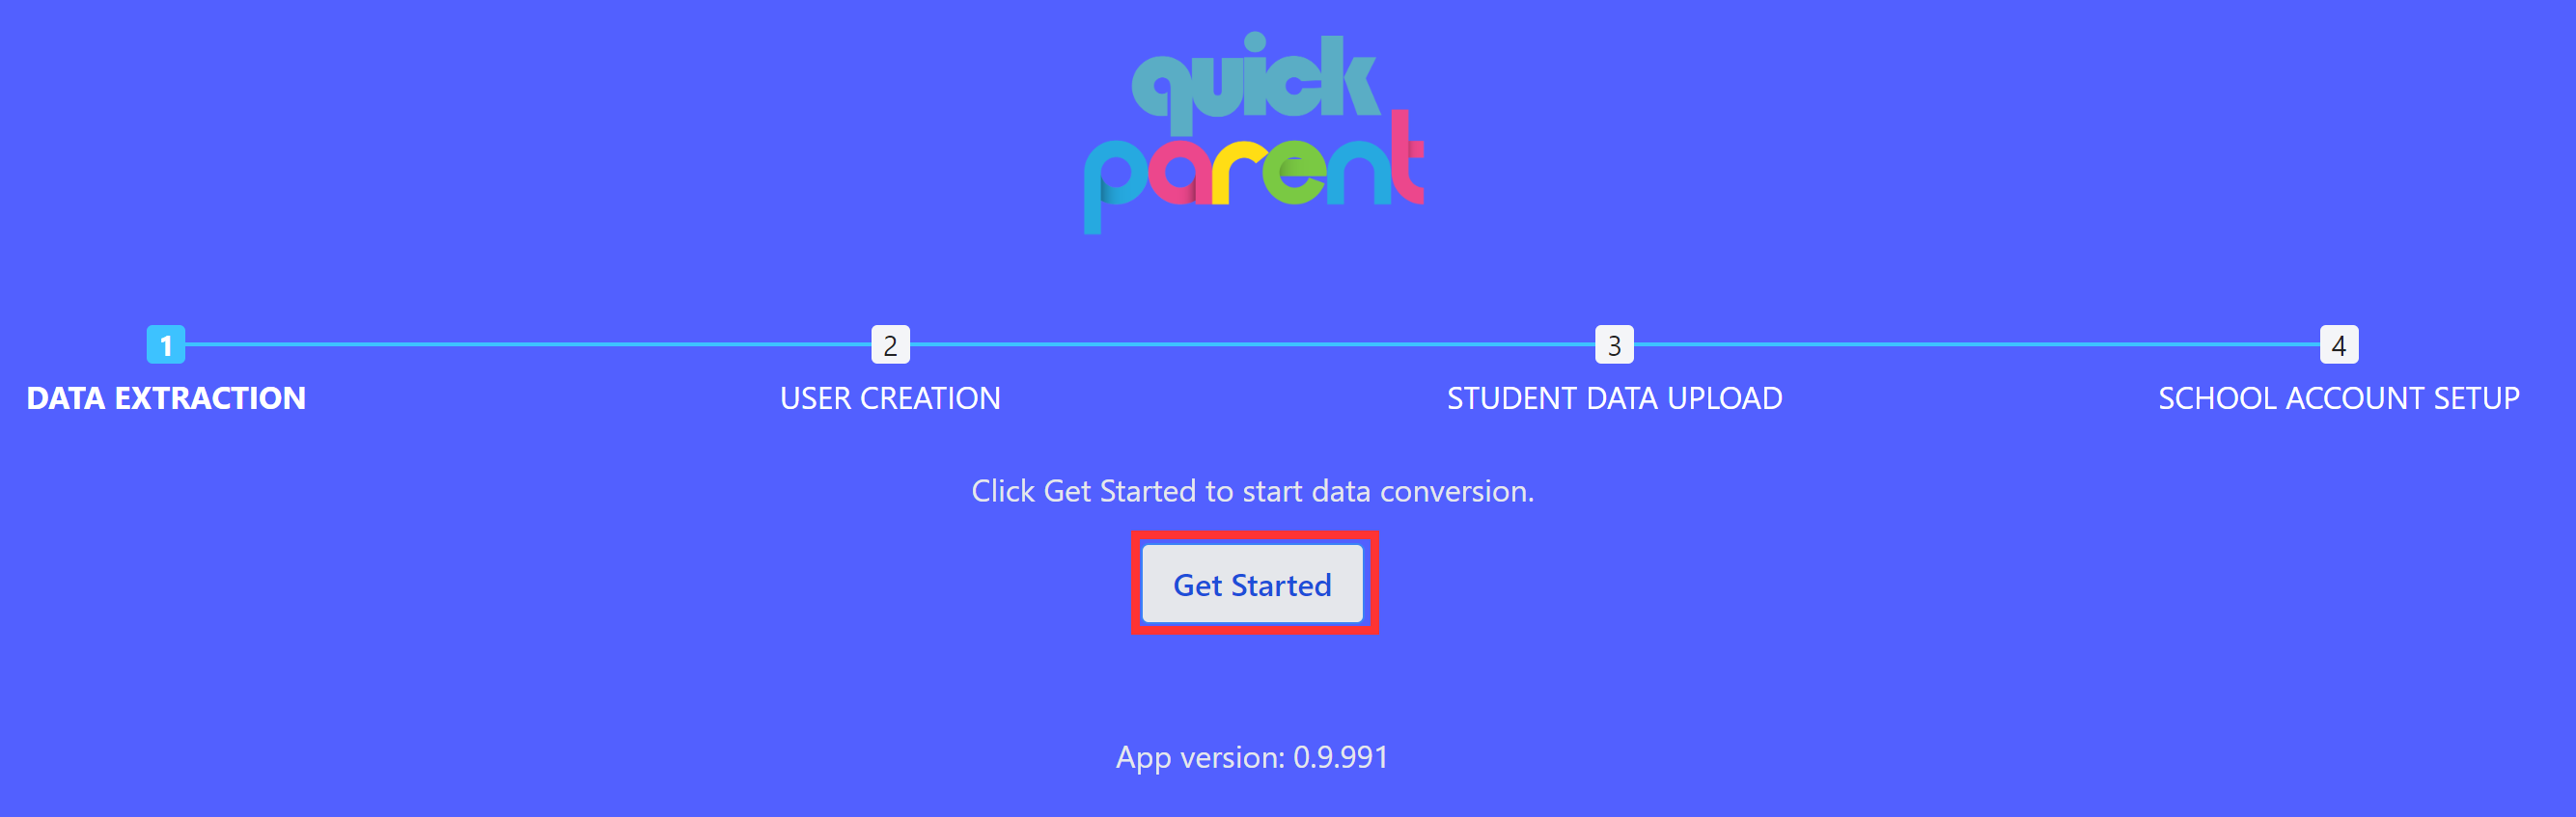
Run
The qp Uploader user interface will open as below. Click get started.
Check for Updates

Once qp Uploader is run, if updates to it are found, they are downloaded and the school is notified and the system automatically updates itself.
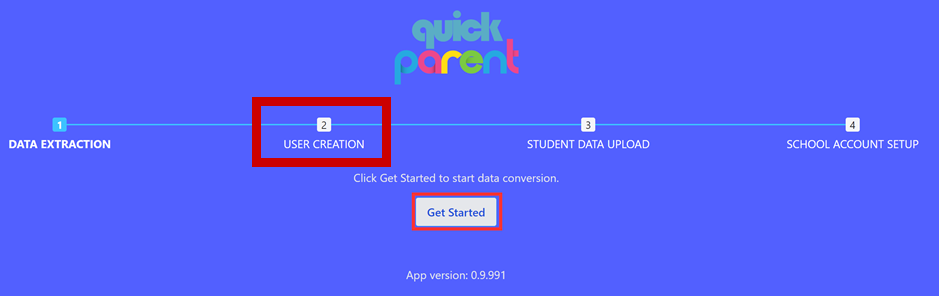
Data Conversion
Check for quickParent Generator (qp Generator)
If installed for the first time (or reinstalled from scratch) the qp Generator is installed simultaneously. If the setup wizard pops up as in the picture below then click through the install processes. Leave the default installation locations as they are.
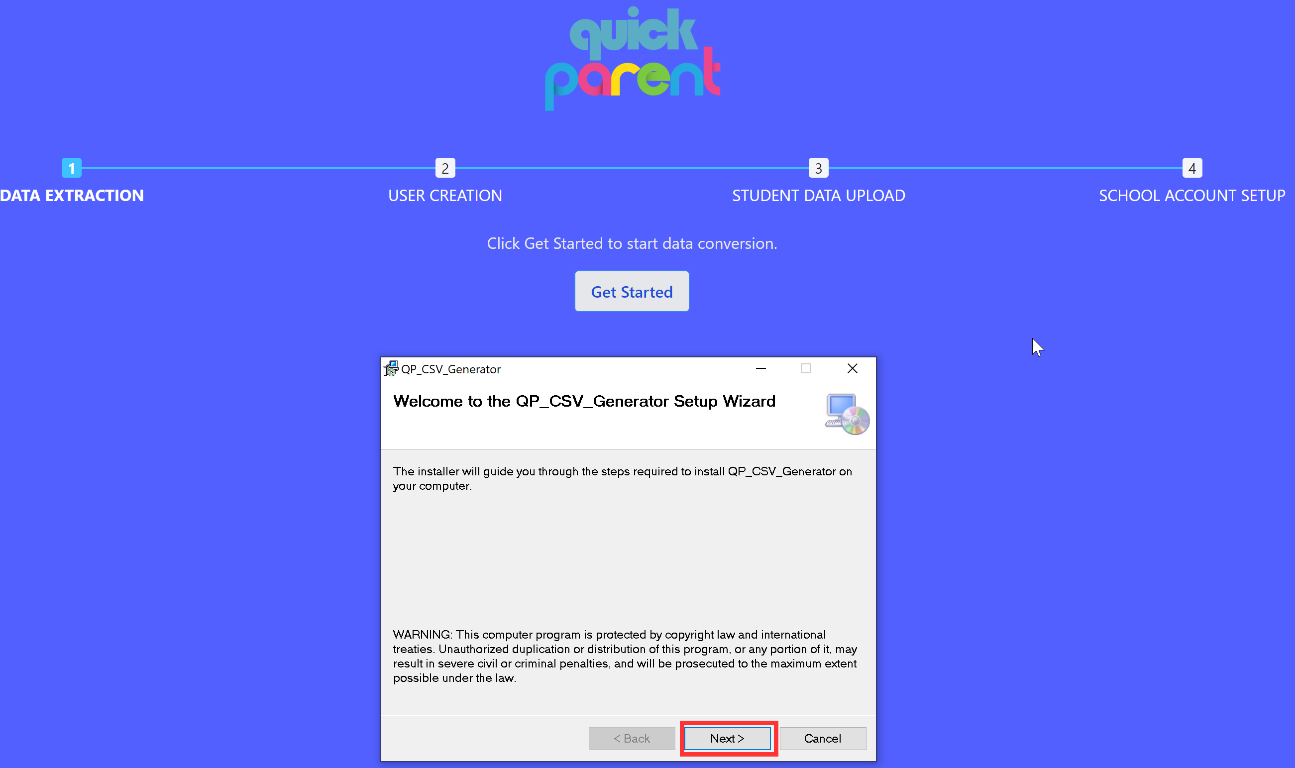
qp Generator
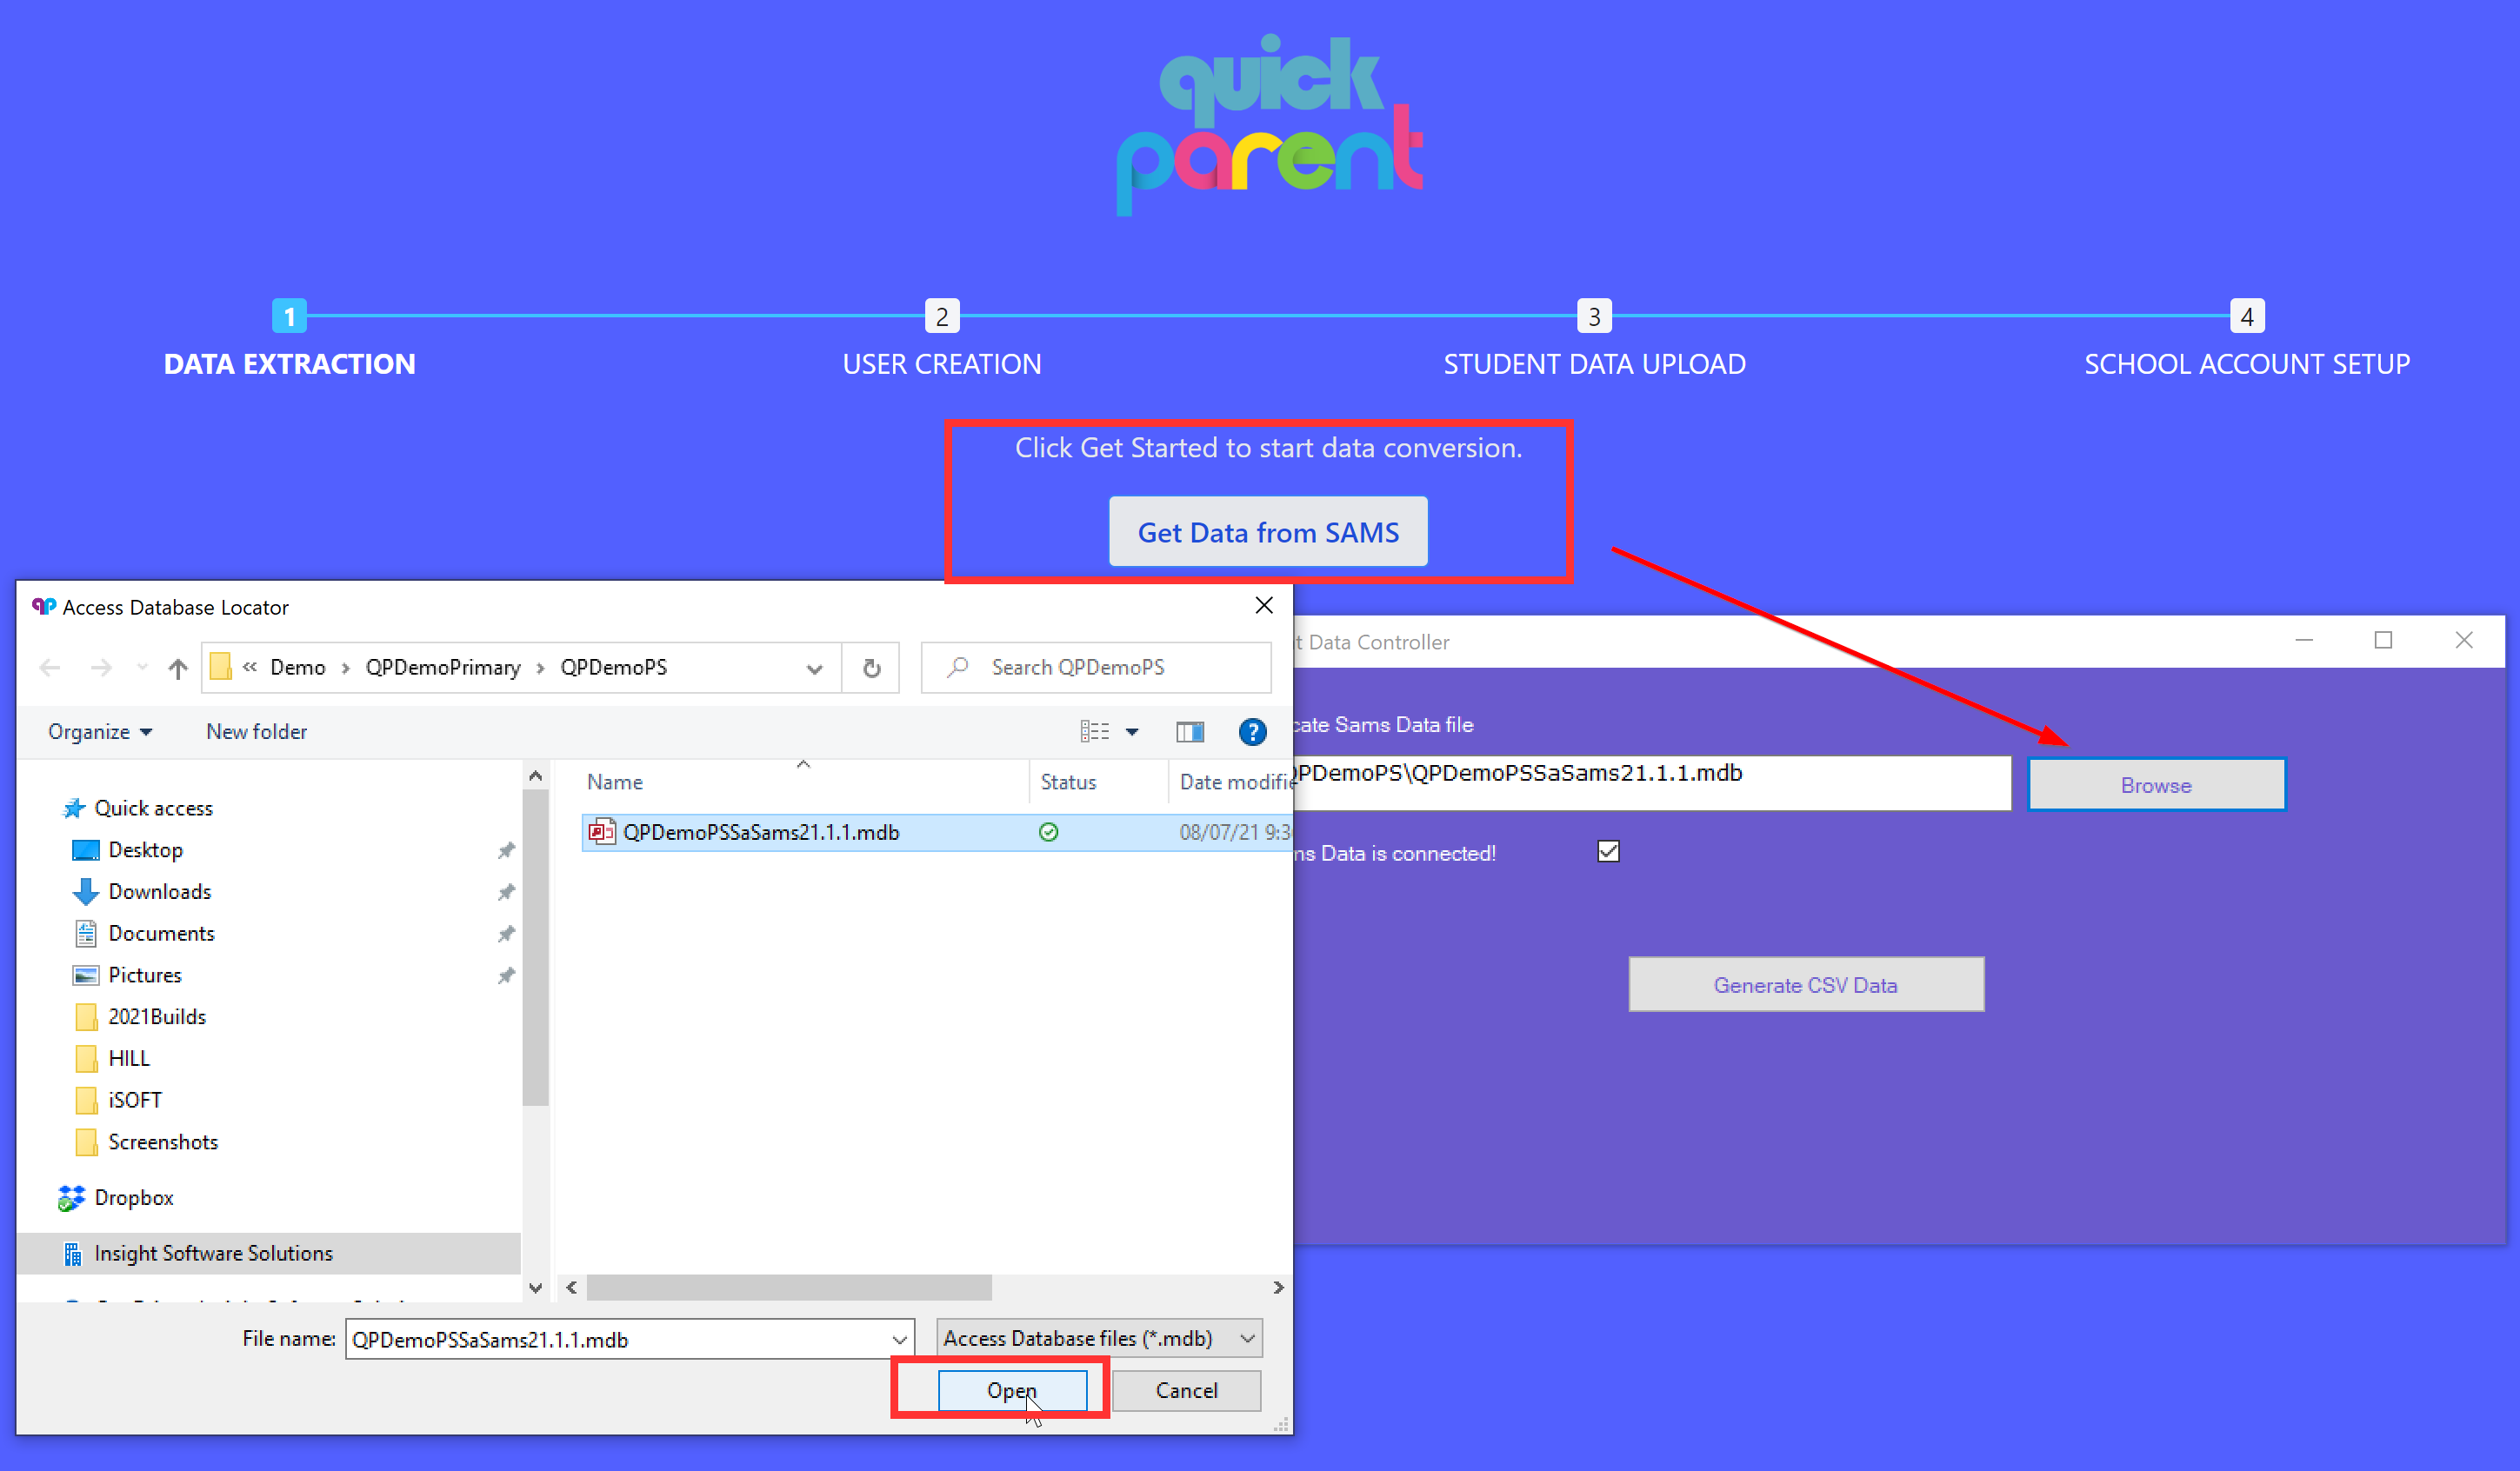
This is a ‘sub’ component of the qp Uploader which manages the connection to your SA-SAMS data. It extracts and readies the data for the QP uploader.
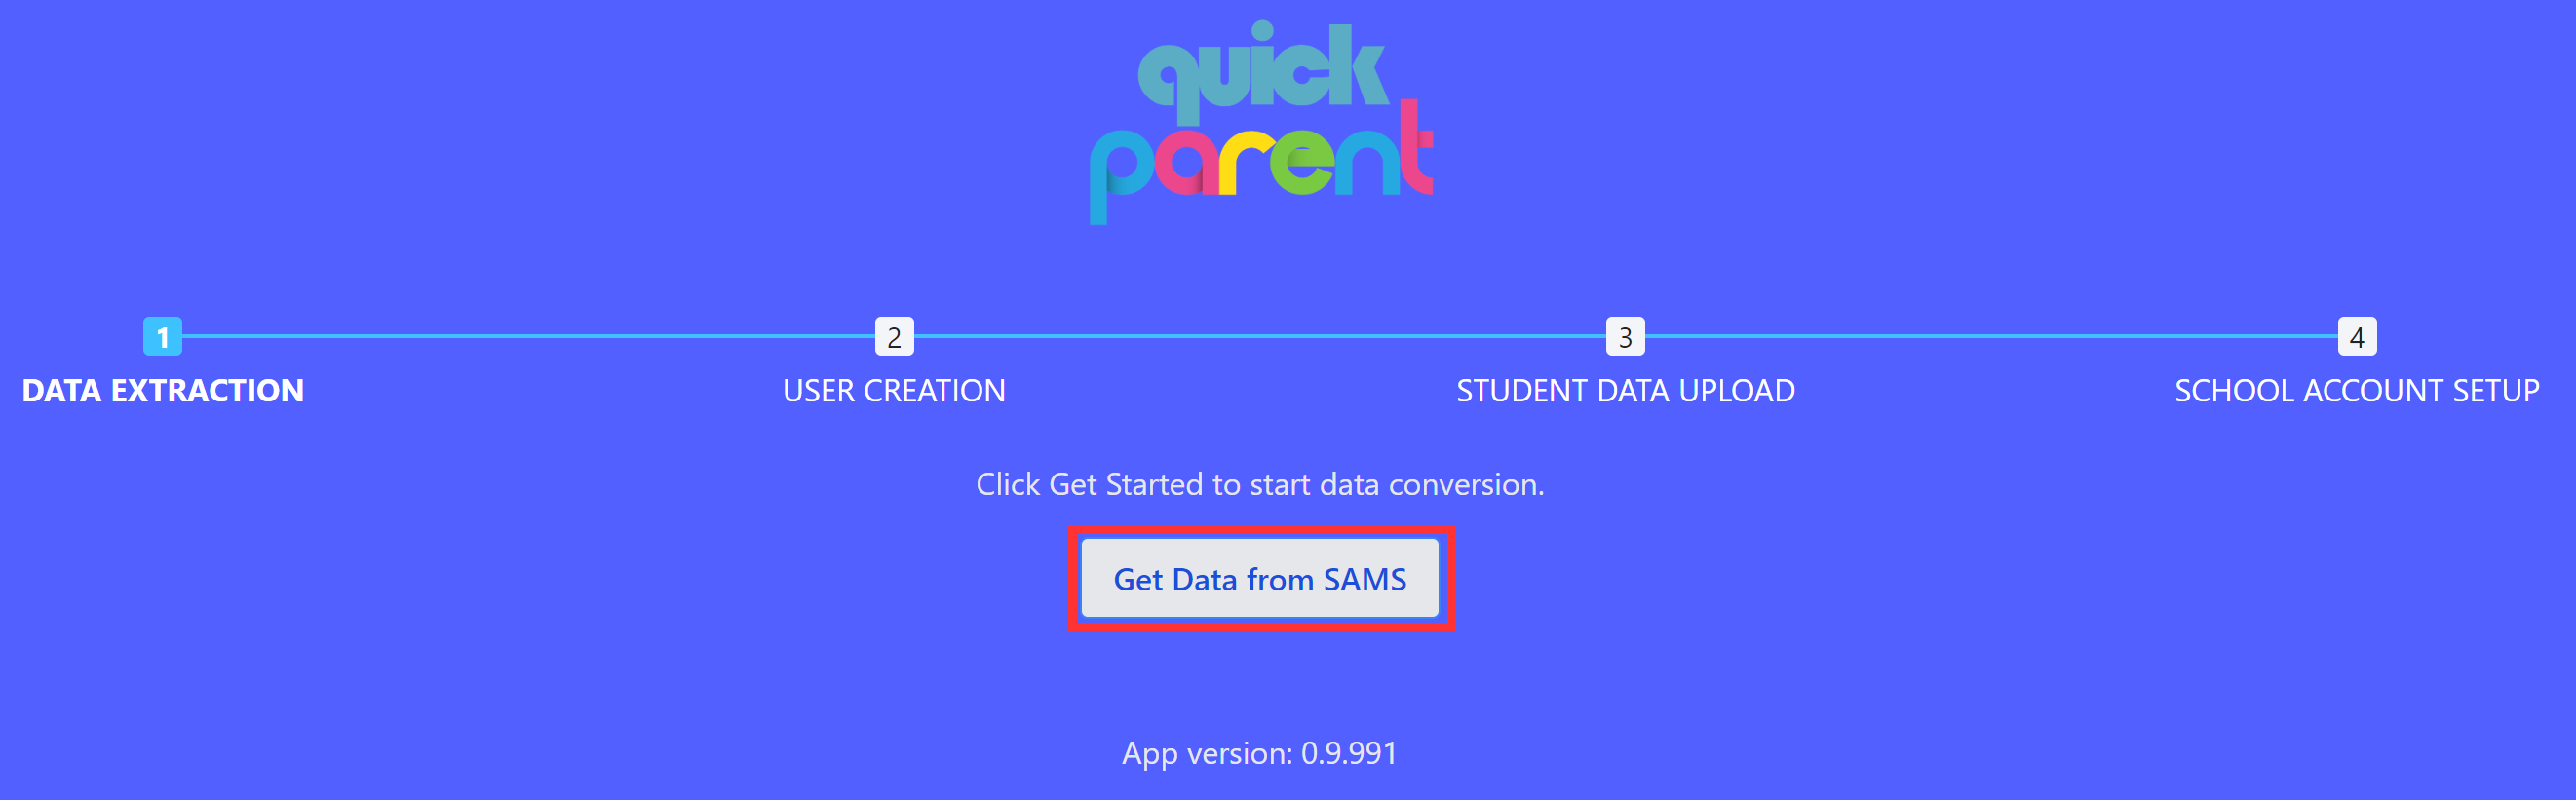
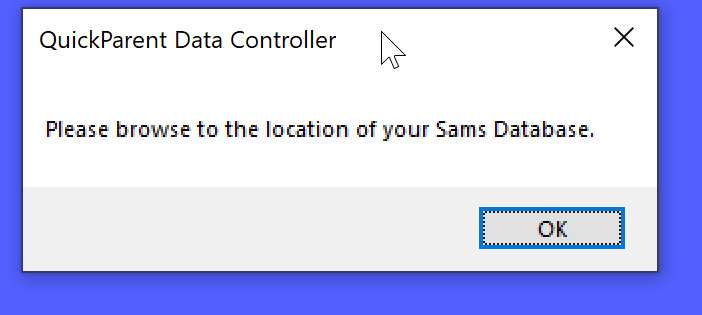
Click Get Data from SAMS. You will see a message telling you to browse to the location of your SAMS data file.
This is the same location (pathway) as when you open your SAMS system:
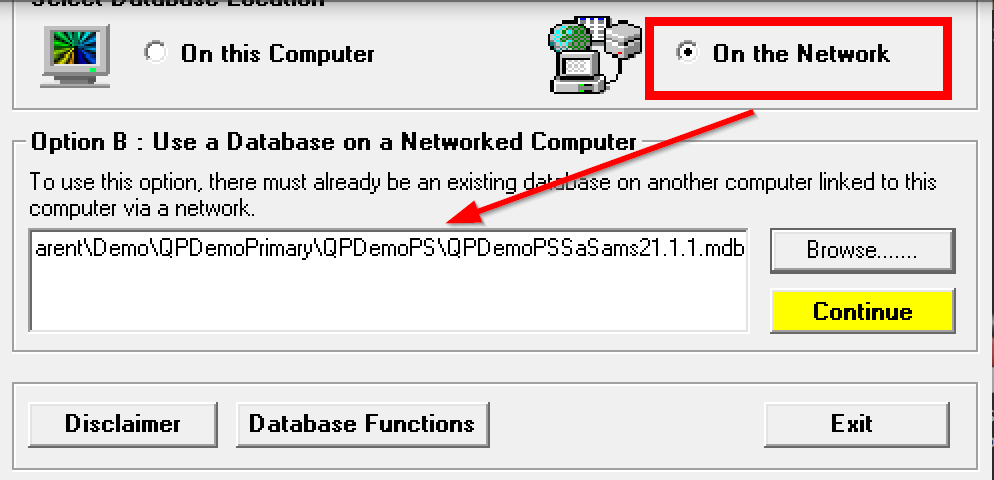
SAMS local Data location

Note that many folks choose the ‘on this computer’ option when opening their SA-SAMS. The pathway to your SA-SAMS data is therefore here:
Make a note of the location of your SA-SAMS data file for the next step.
Using data file copies
Note that you CAN use a copy of your SA-SAMS data file but then it is important to note the following:
- The quickParent Uploader will poll (check) your SA-SAMS data every so often for changes.
- If you have it pointing at a copy of your SA-SAMS data file then you MUST remember to replace that copy of your SA-SAMS data every so often with a copy of your live SA-SAMS data file (the one that you open with SA-SAMS). ie. this process must be repeated every so often (preferably when changes are made that you want parents to see eg: new task marks, merit/demerit records, absentee records.
- The SA-SAMS data file that you copy must keep the same name and location as the original copy otherwise the quickParent converter won’t have the latest data to convert.
Link SAMS data file
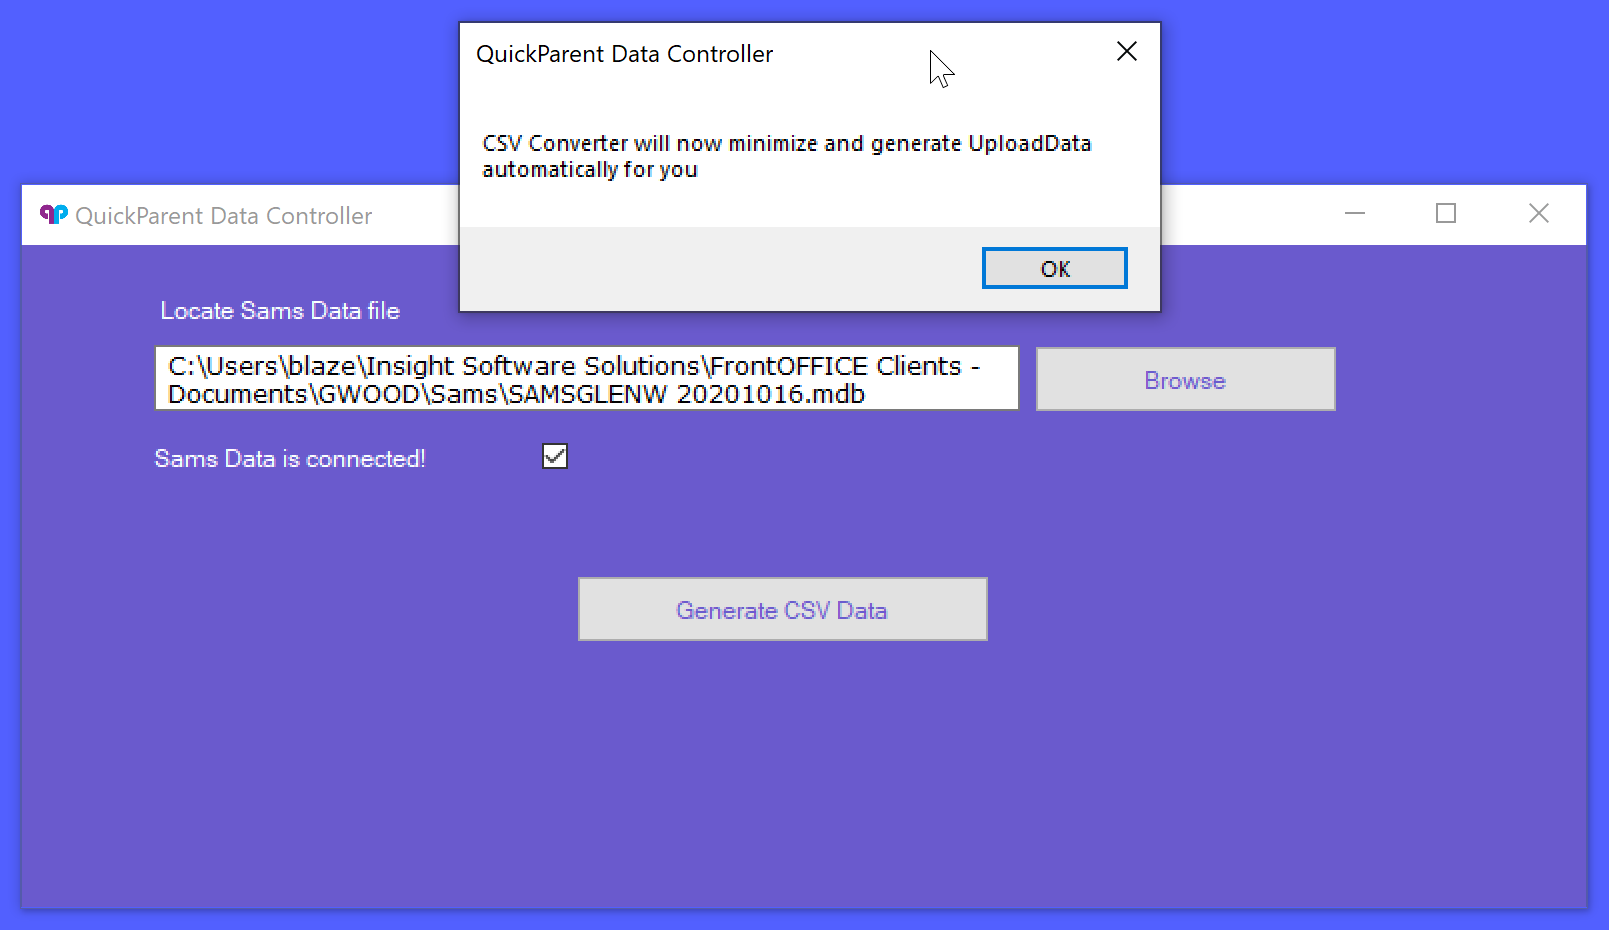
In the qp Generator, browse to your SA-SAMS data file location then click ‘Generate CSV Data’.
You will be notified when this process is complete:
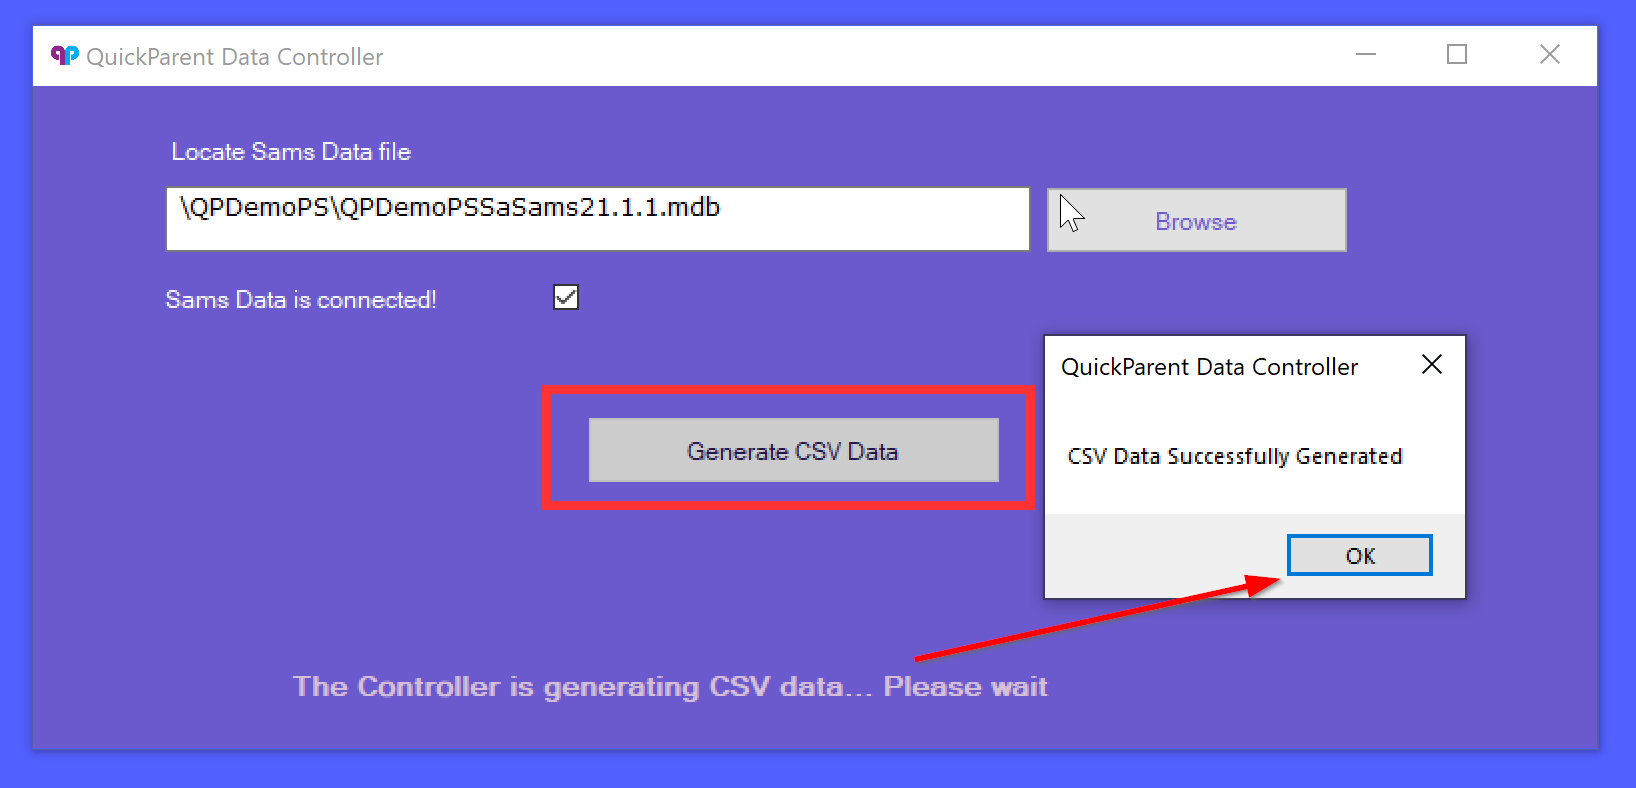
This indicates that the qp Generator was successful :
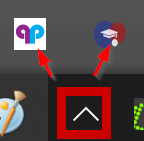
Once installed the applications will run in the background and can be viewed in your system tray. The qp icon refers to the uploader application and the graduator cap icon refers to the extractor application and both can be closed by right-clicking and choosing quit.
An unlikely error at this point generally means that your SA-SAMS data file is populated by a 3rd party that exhibits invasive data input (export) mechanisms and or even complete data file ‘mimmicary’ (ie. creating a ‘lookalike’ file as opposed to the more subtle comparative synchronicity, record priority and original data file structure integrity control techniques and that means the data in your tables needs reviewing. Contact us and we can assist you with this as is it extremely likely to only be a small adjustment required to make. It should be added here, however, that despite the vast majority of 3rd party providers in South Africa practising invasive export techniques, that the data being extracted from your SA-SAMS database is not complex and so provided that even some modicum of adherence to their data structure has been applied by the 3rd party in the data export to SA-SAMS process, the extraction of your SA-SAMS data to the quickParent Portal for SA-SAMS should go forward without a hitch. As mentioned, if there is any issue please contact the quickParent support team at [email protected] and we can assist.
Export of Parent Data
Creation of Login Details
First-time login details for parents are automatically generated at this point. The email assigned to the parent in SA-SAMS is used for the username so it is imperative that they are captured correctly and are in use.
![]()
(Note: There is a tool that links directly to your SA-SAMS data that can be used for checking the validity of the email addresses. QuickMail, can be used to send emails to parents so that one can check that the emails are valid and in use. (or FrontEmail if you use FrontOFFICE) Let us know if you would like help with this at [email protected])
Login Details Email Parents
The file with the first-time usernames and passwords for the parents that you have saved as per the step above, is a CSV file (which can be opened in Excel). This can be emailed to parents along with a link to download the app on their mobile phones, using a mail merge (ie. each record goes to each parent so they are ONLY seeing their own log in username and password). When a parent logs in for the first time they will be prompted to change this password.
SMS Parents (Still coming)
Parents will receive an SMS with their username (their email address) and password and links to install QP. Strong “first time” passwords are generated and encrypted in storage so they are secure.
Upload all Parent Info
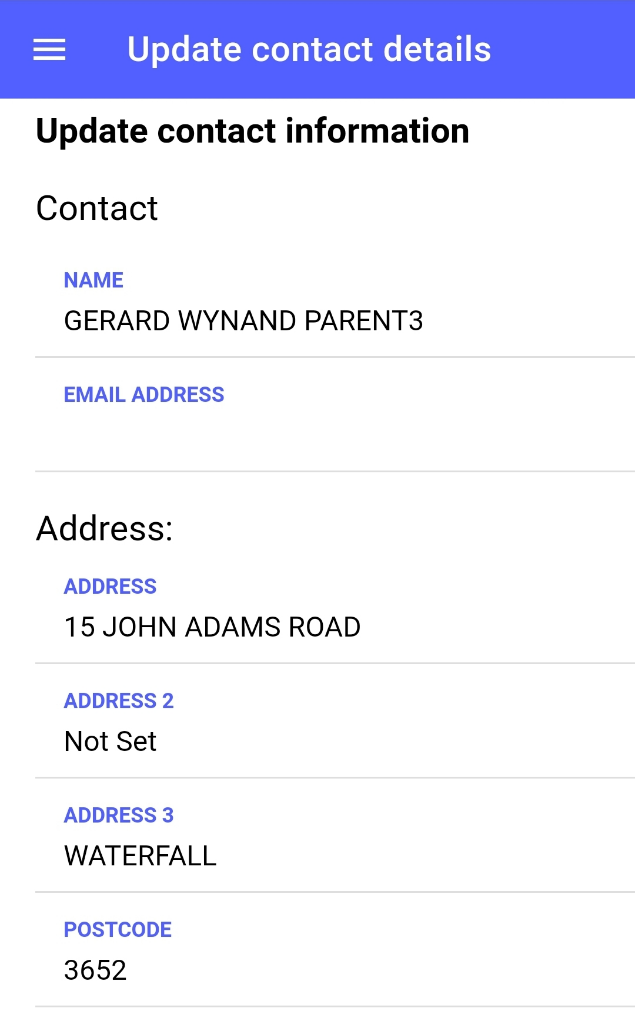
This updates contact details of the parents in the mobile app
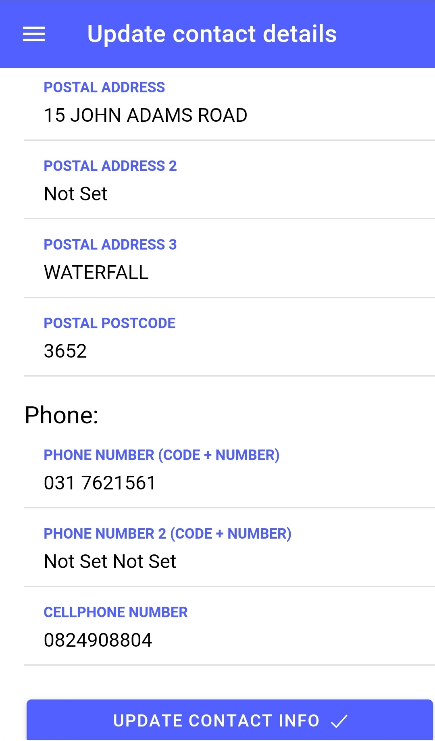
This notifies the school of the data change via email and enables the school to vet the changes (ie. they are not made directly to your SASAMS data file) and then physically commit the data changes themselves (quickParent practices non-invasive integration with SASAMS so that your SASAMS data remains untouched by 3rd party interaction).
School Access to all info
During the first-time upload, the parent log in details are created and pop up on the screen for the user to save and store.
Insert screenshot of first time log ins here
It is important to save and store this immediately so that you have access to it in order to apprise or assist parents with logging on. If you DO by chance not save it at this time then it is not a tragedy, simply contact us and we will provide you with the document for you to store.
Export of Student Data
1.1.4.1 Upload all Student Data
The students are uploaded and linked to the parents during the first-time upload event.
1.1.4.2 Upload all Academic Data
All Subject and task data is uploaded as well as absenteeism. Other report data such as subject comments, class teacher comments, co-curricular, subject teachers, grade heads etc. will be add to the qp Mobile app in version 2 due in later 2022.
Export of School Data
Upload School Information
School information is uploaded from the School info section of SAMS
At this point the school is notified of their log in details for the qp School News Portal (qpSNP).
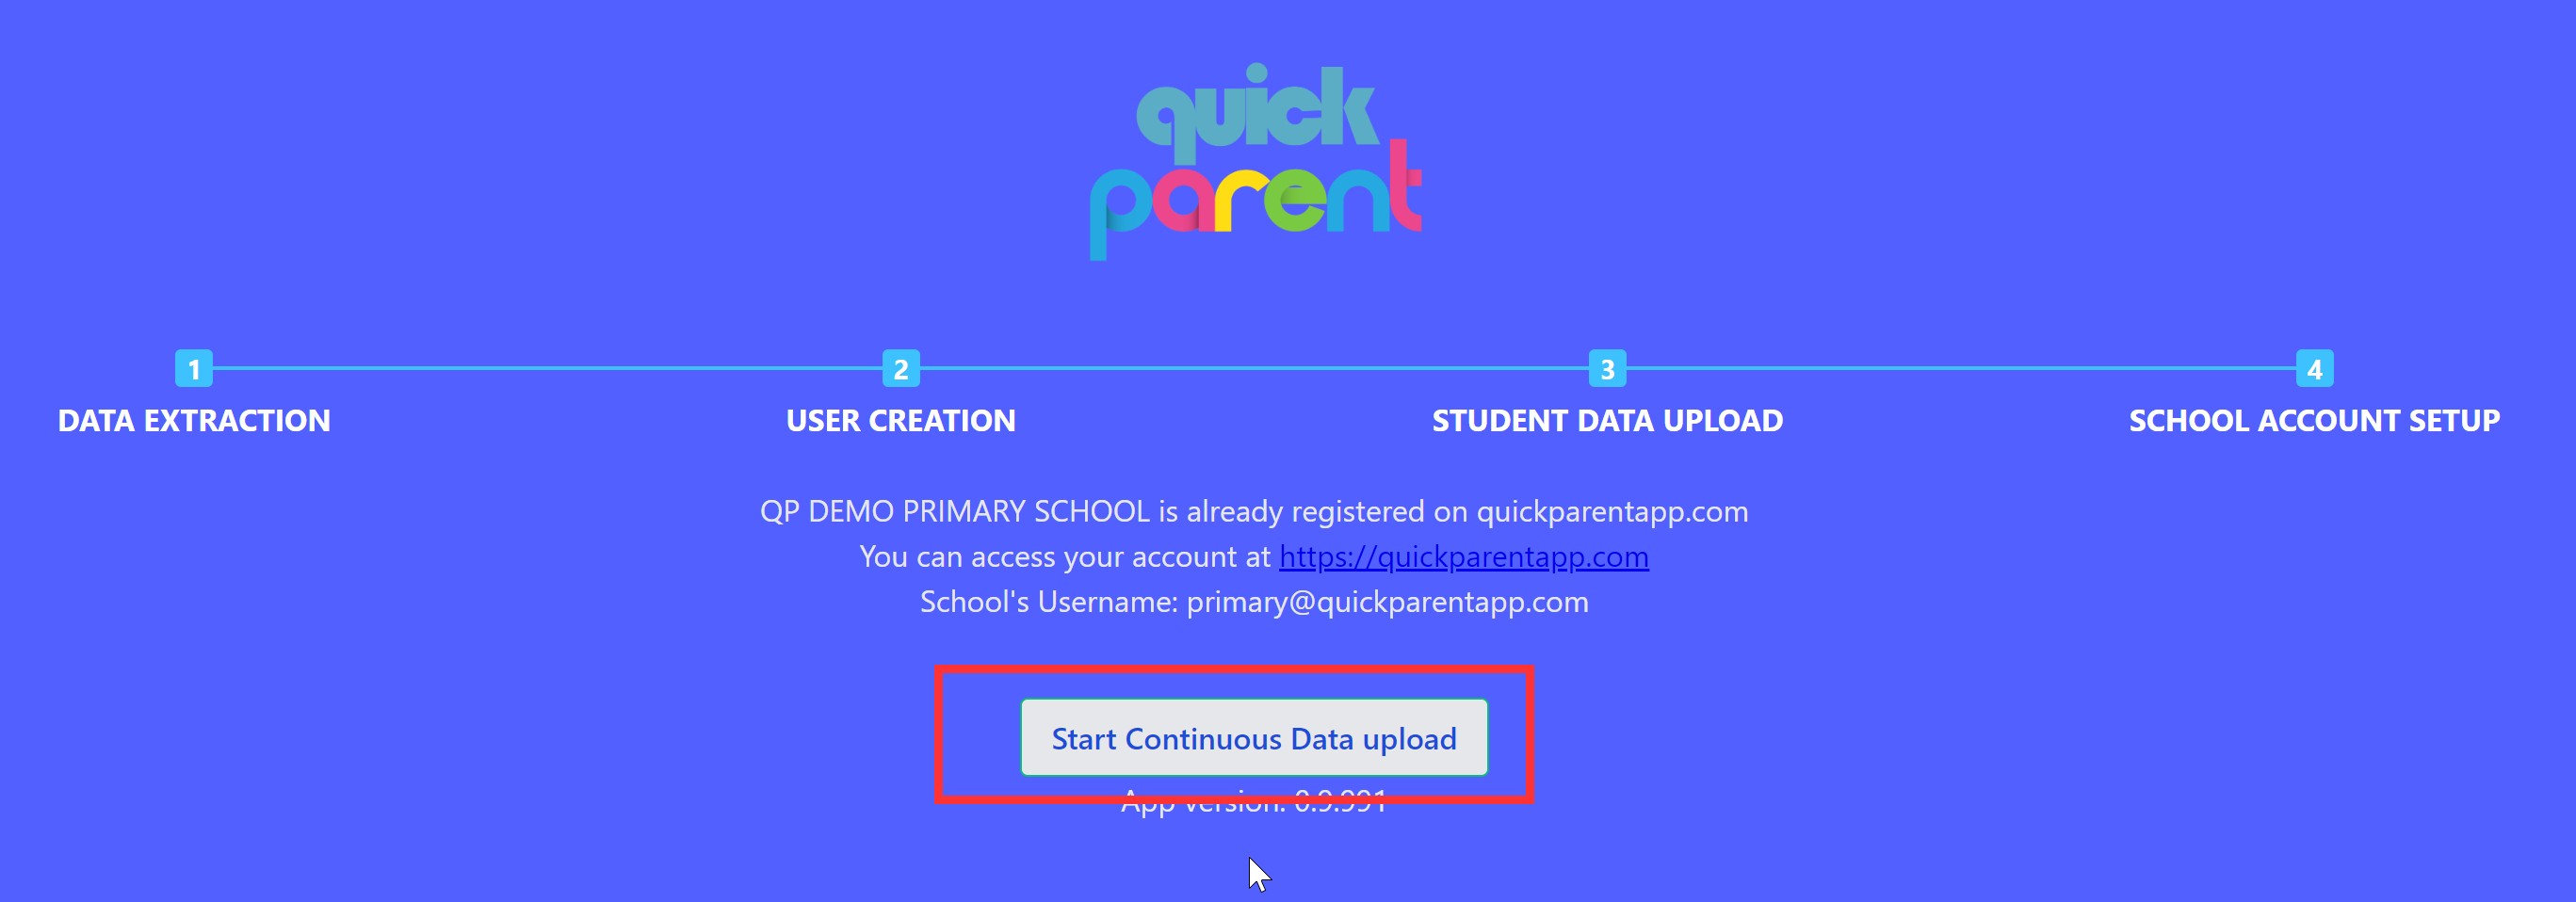
Create School Account
The school’s account is created. The user must make note of the school’s news portal (webpage) username and password that will be shown on the screen, which looks like this:

Continuous mode
The uploader sits ‘resident’ on the computer and intermittently scans the SAMS data file from time to time, checks for changes and uploads them.
![]()
From time to time you will see the following popup which advises the status of the current upload:
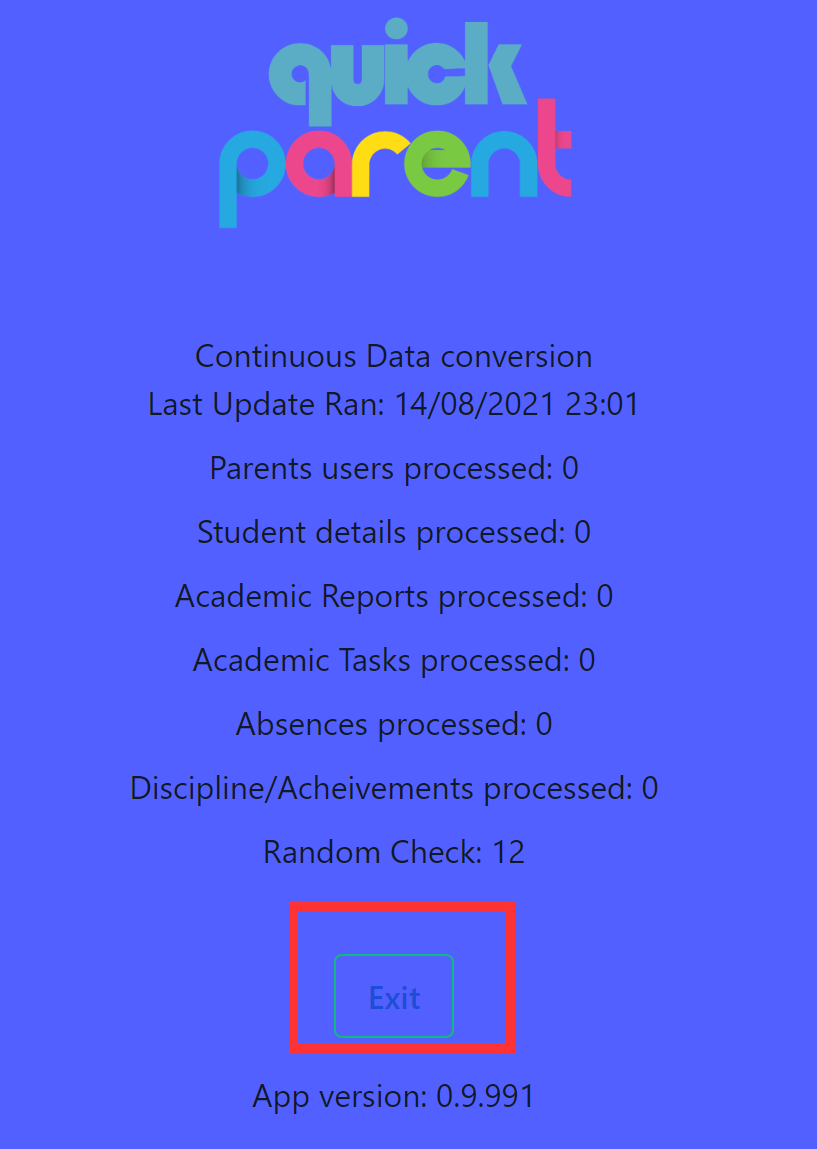
Difference Check
Differences between the data in the cloud and the data in your SAMS data file are looked for in the following categories by comparing the data in the SAMS data file with the CSV files from the last upload:
Parents, Students, Subject Marks, Task Marks, Absences, School Info
Records are upserted based on any changes found ie. Any new records found are added, any changes to the data are uploaded and where data has been deprecated in SAMS it will be deprecated in the online repository.
qp Converter (Data extractor)
The qp Converter is an element of your qp Connector application that is activated from time to time by the continuous upload mode that is running ‘in the background’. It reads your SASAMS data file and creates .csv files for the uploader to read.
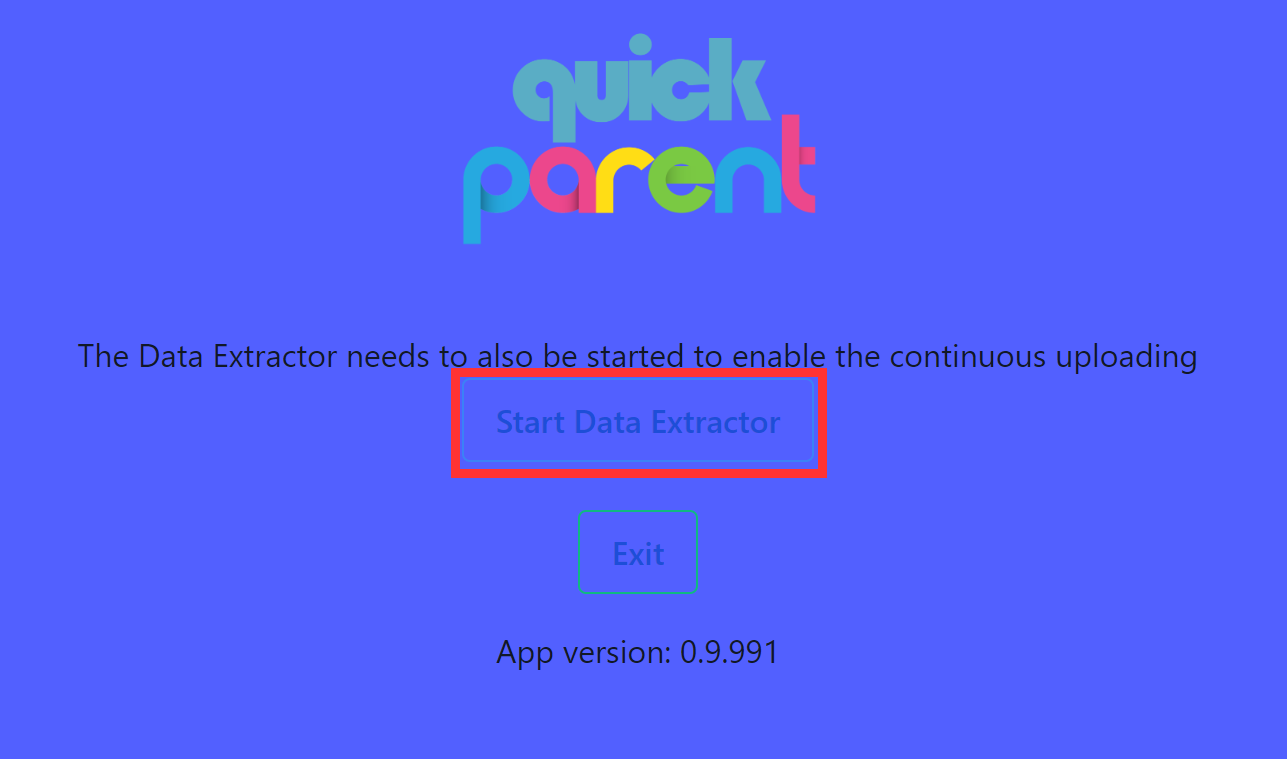
PC Restart
The qp Connector will automatically restart with your computer. If you wish to activate it, click ‘Start Data Extractor’
The qp Data Controller will also open giving you the opportunity to redirect the qp Connector to a different SAMS data location if you wish:
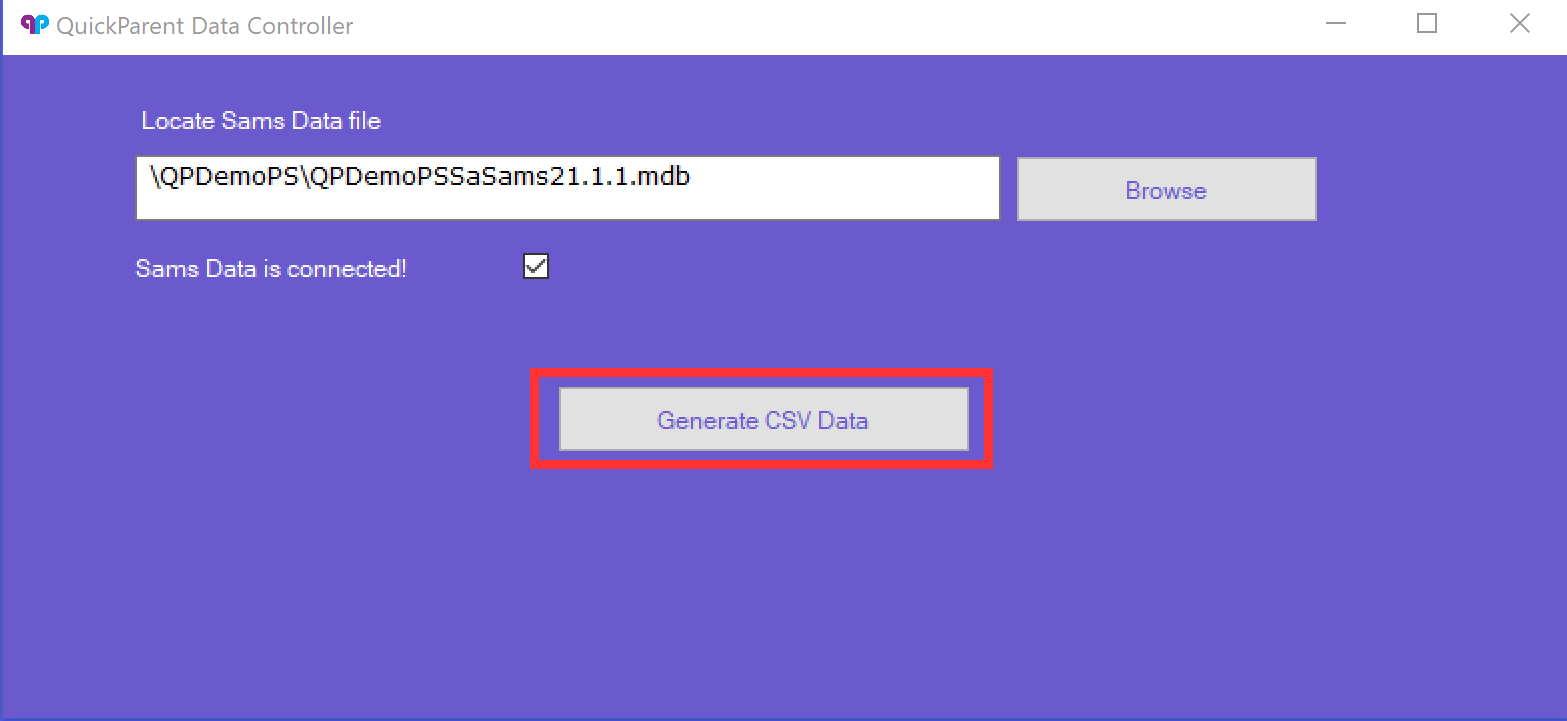
Click Close if you are happy with the current location or browse to the new location of your data file and click Generate CSV Data.
Quit qp Connector
![]()
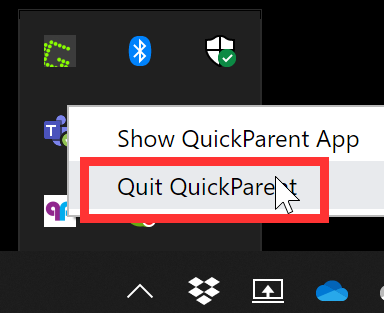
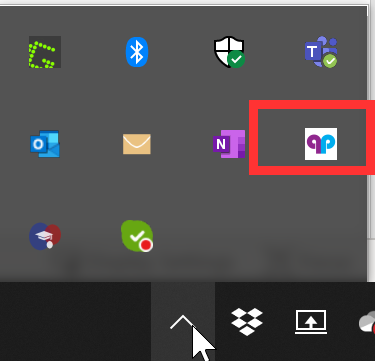
In order to quit qp Connector, right-click on the qp icon in your system tray and choose ‘Quit QuickParent’.
quickParent School News Portal (qpSNP)
![]()

2.1 Log in
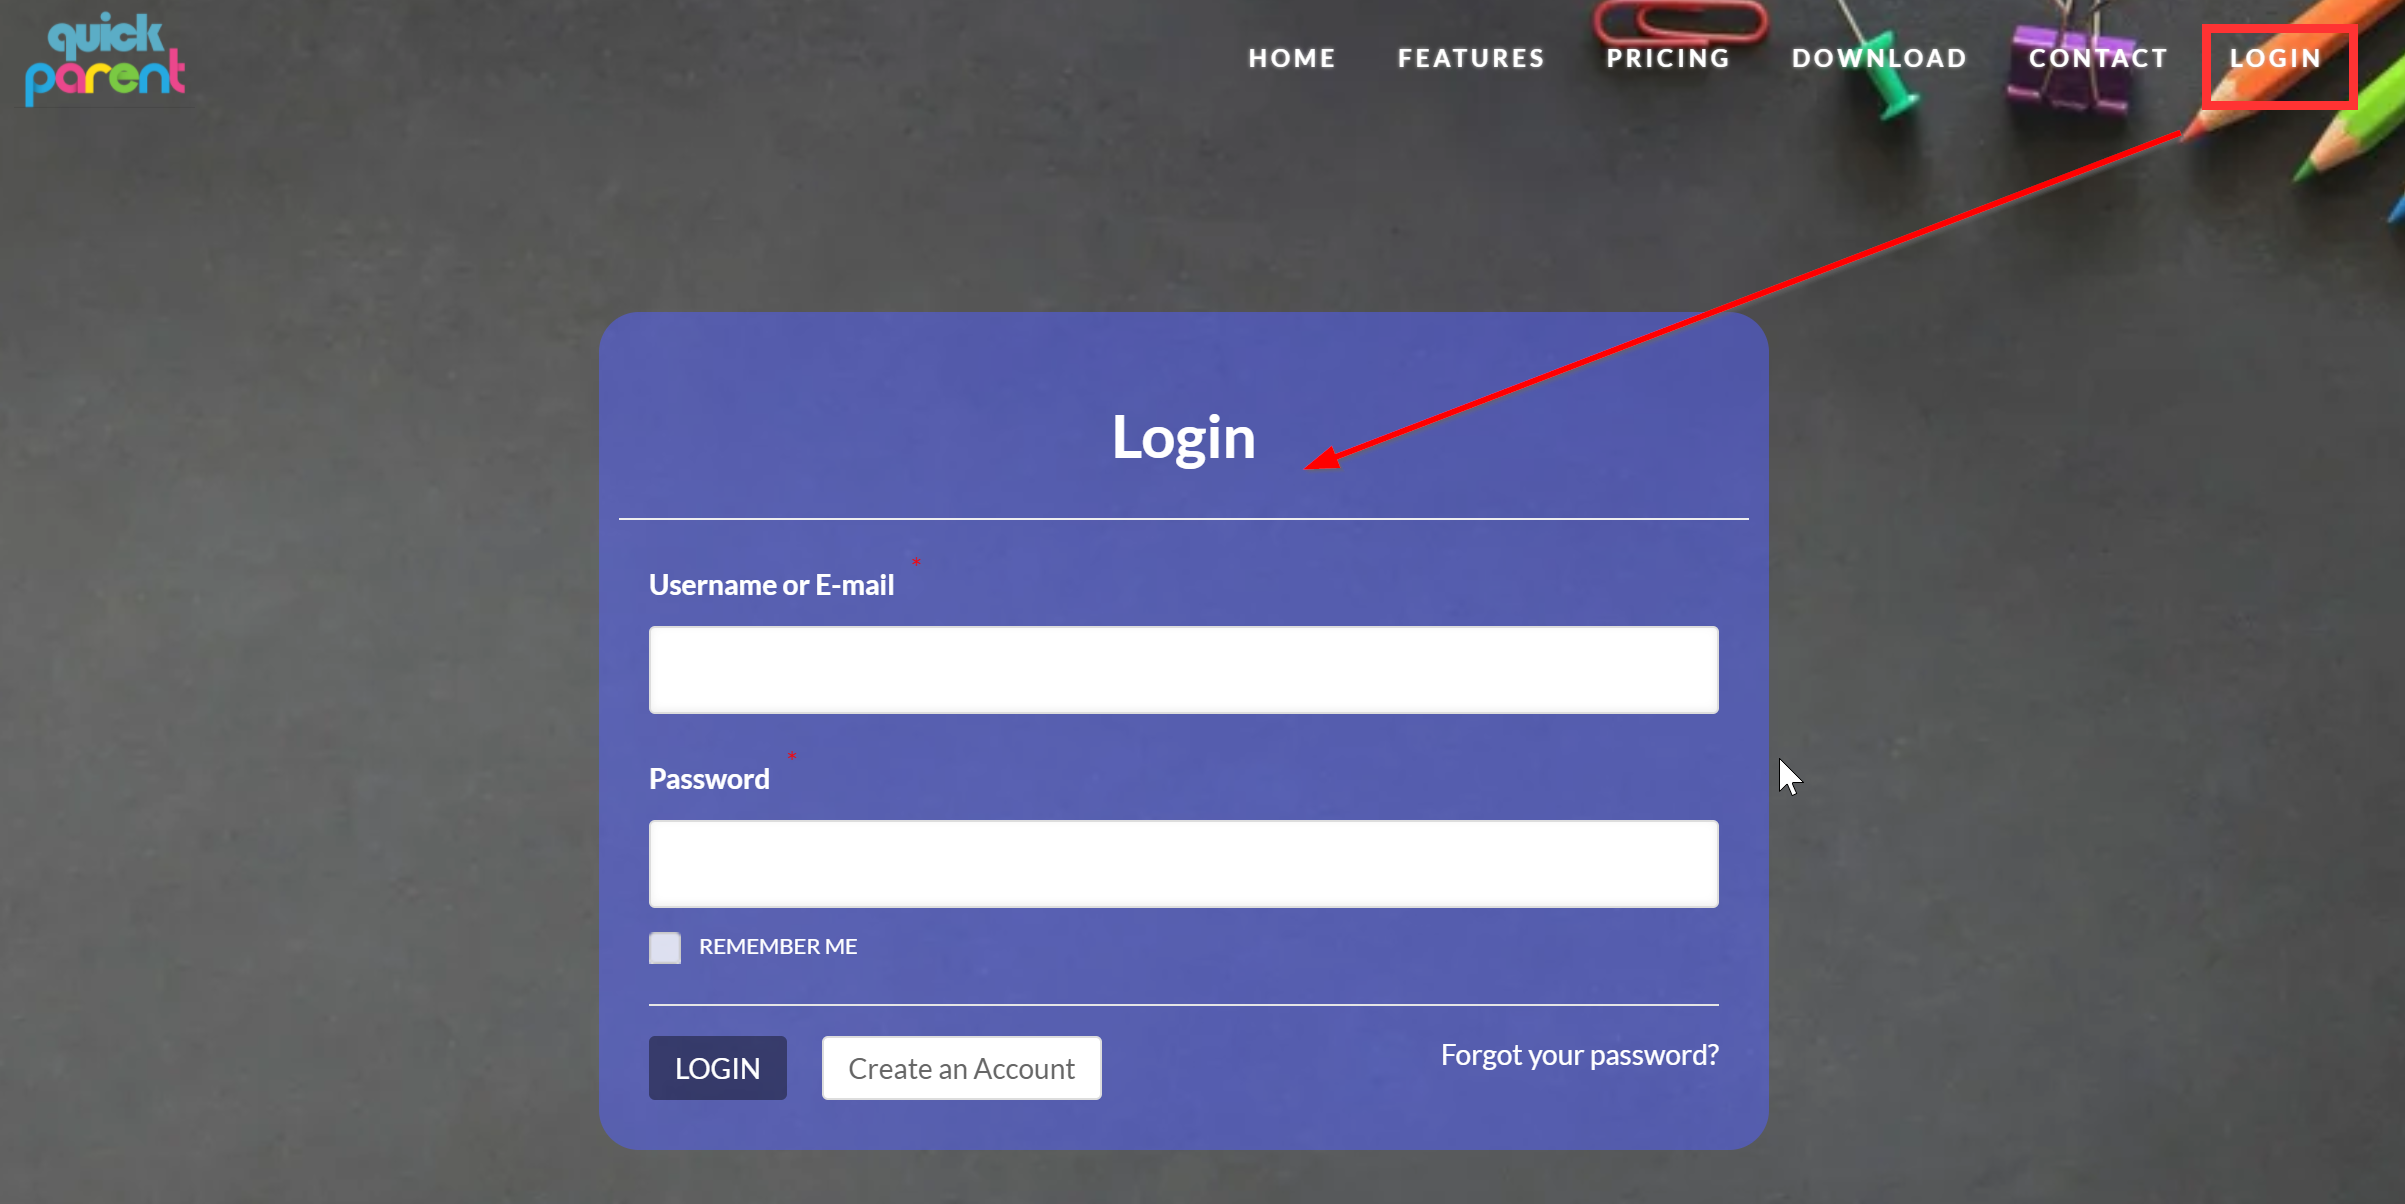
Log in with the username and password that was generated for the school when the initial setup of the quickParent Connector is done.
2.1.1 Forgot Password
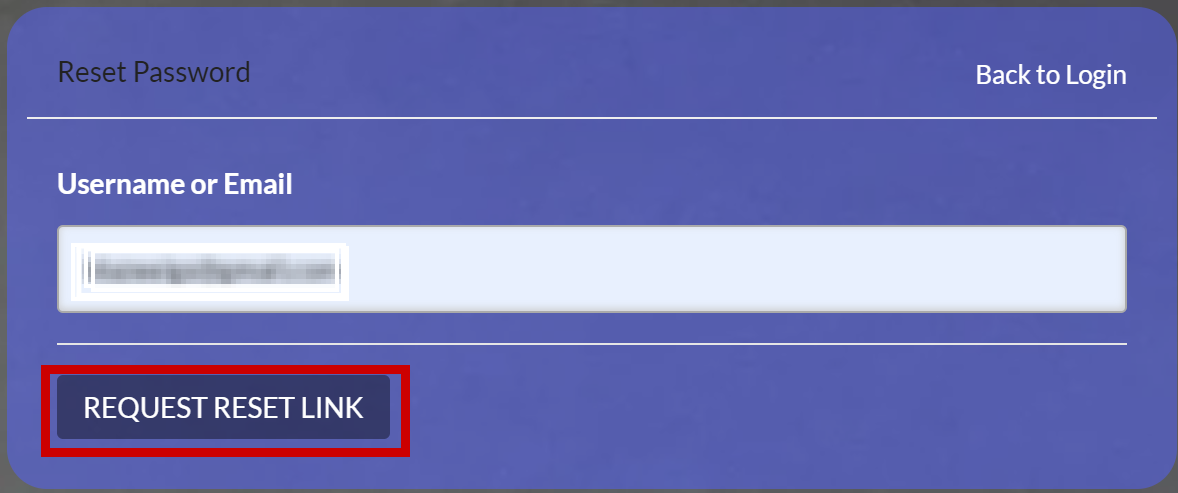
Enter your email and click ‘Request Reset Link’
School News
Click on School News to view the articles that the school has published.
News Portal

Click on the News Portal tab to go to the news.
Add News
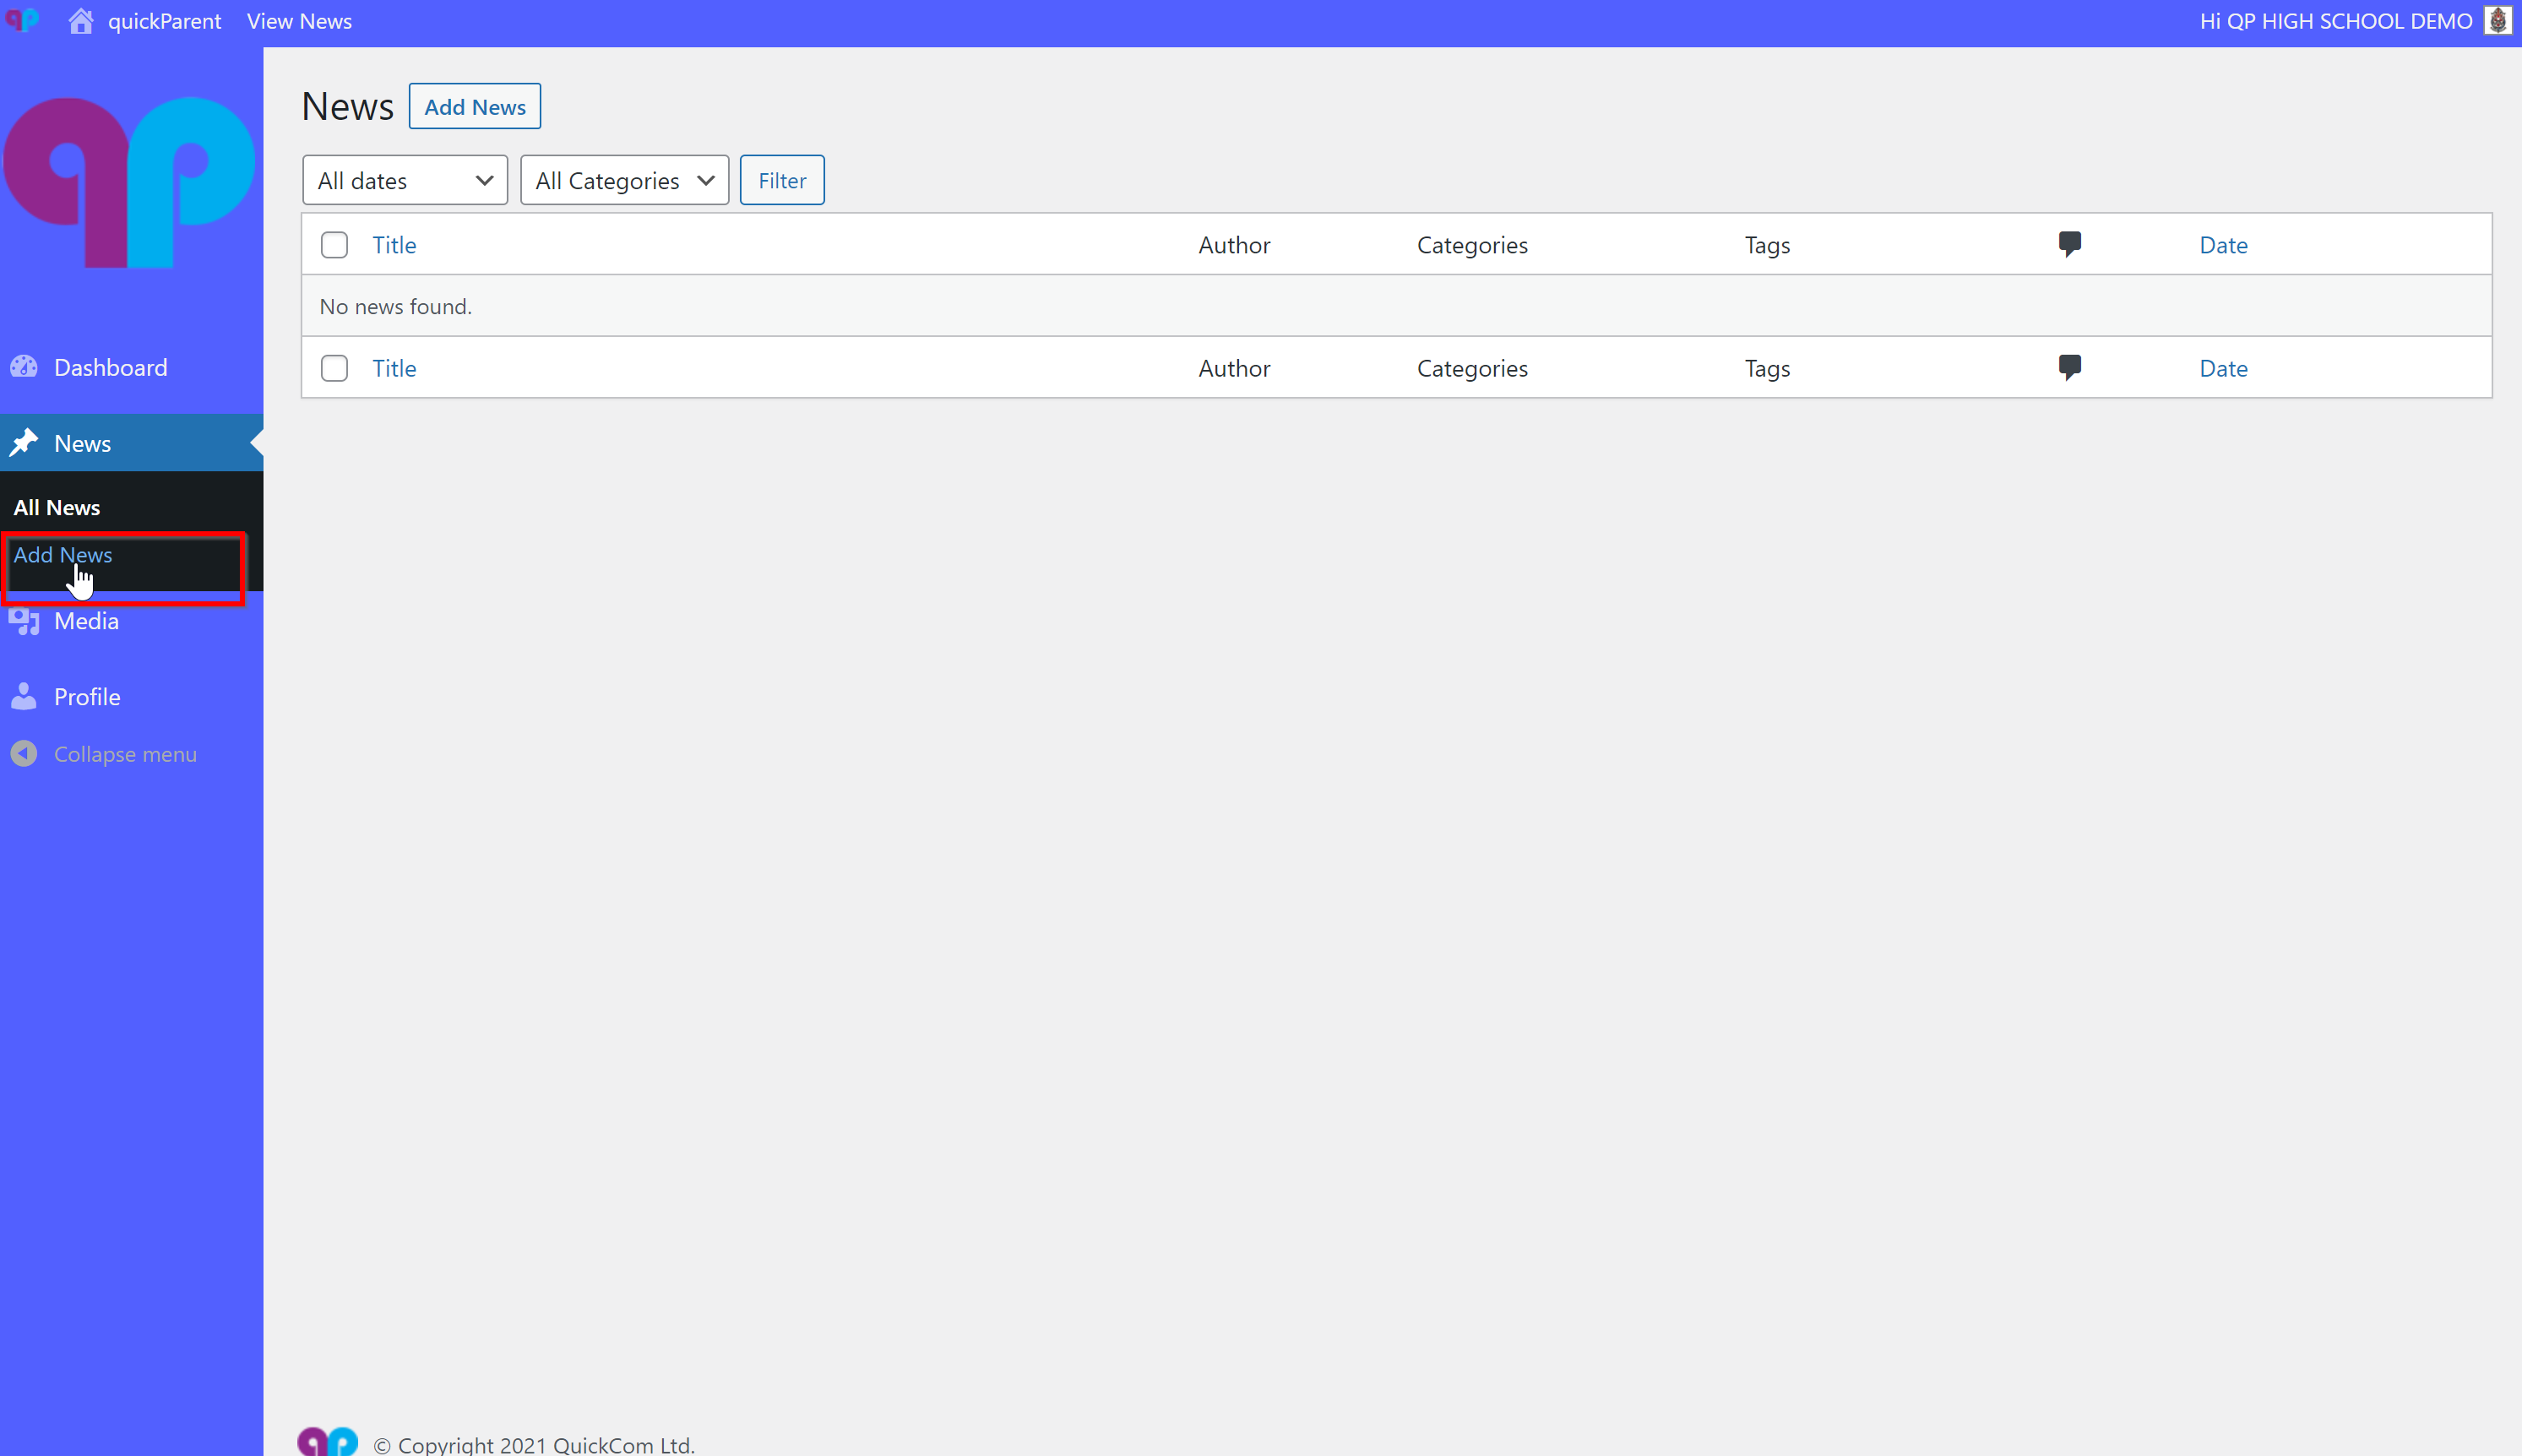
Click Add News in order to create and publish an article
Create Article and Select the Recipients
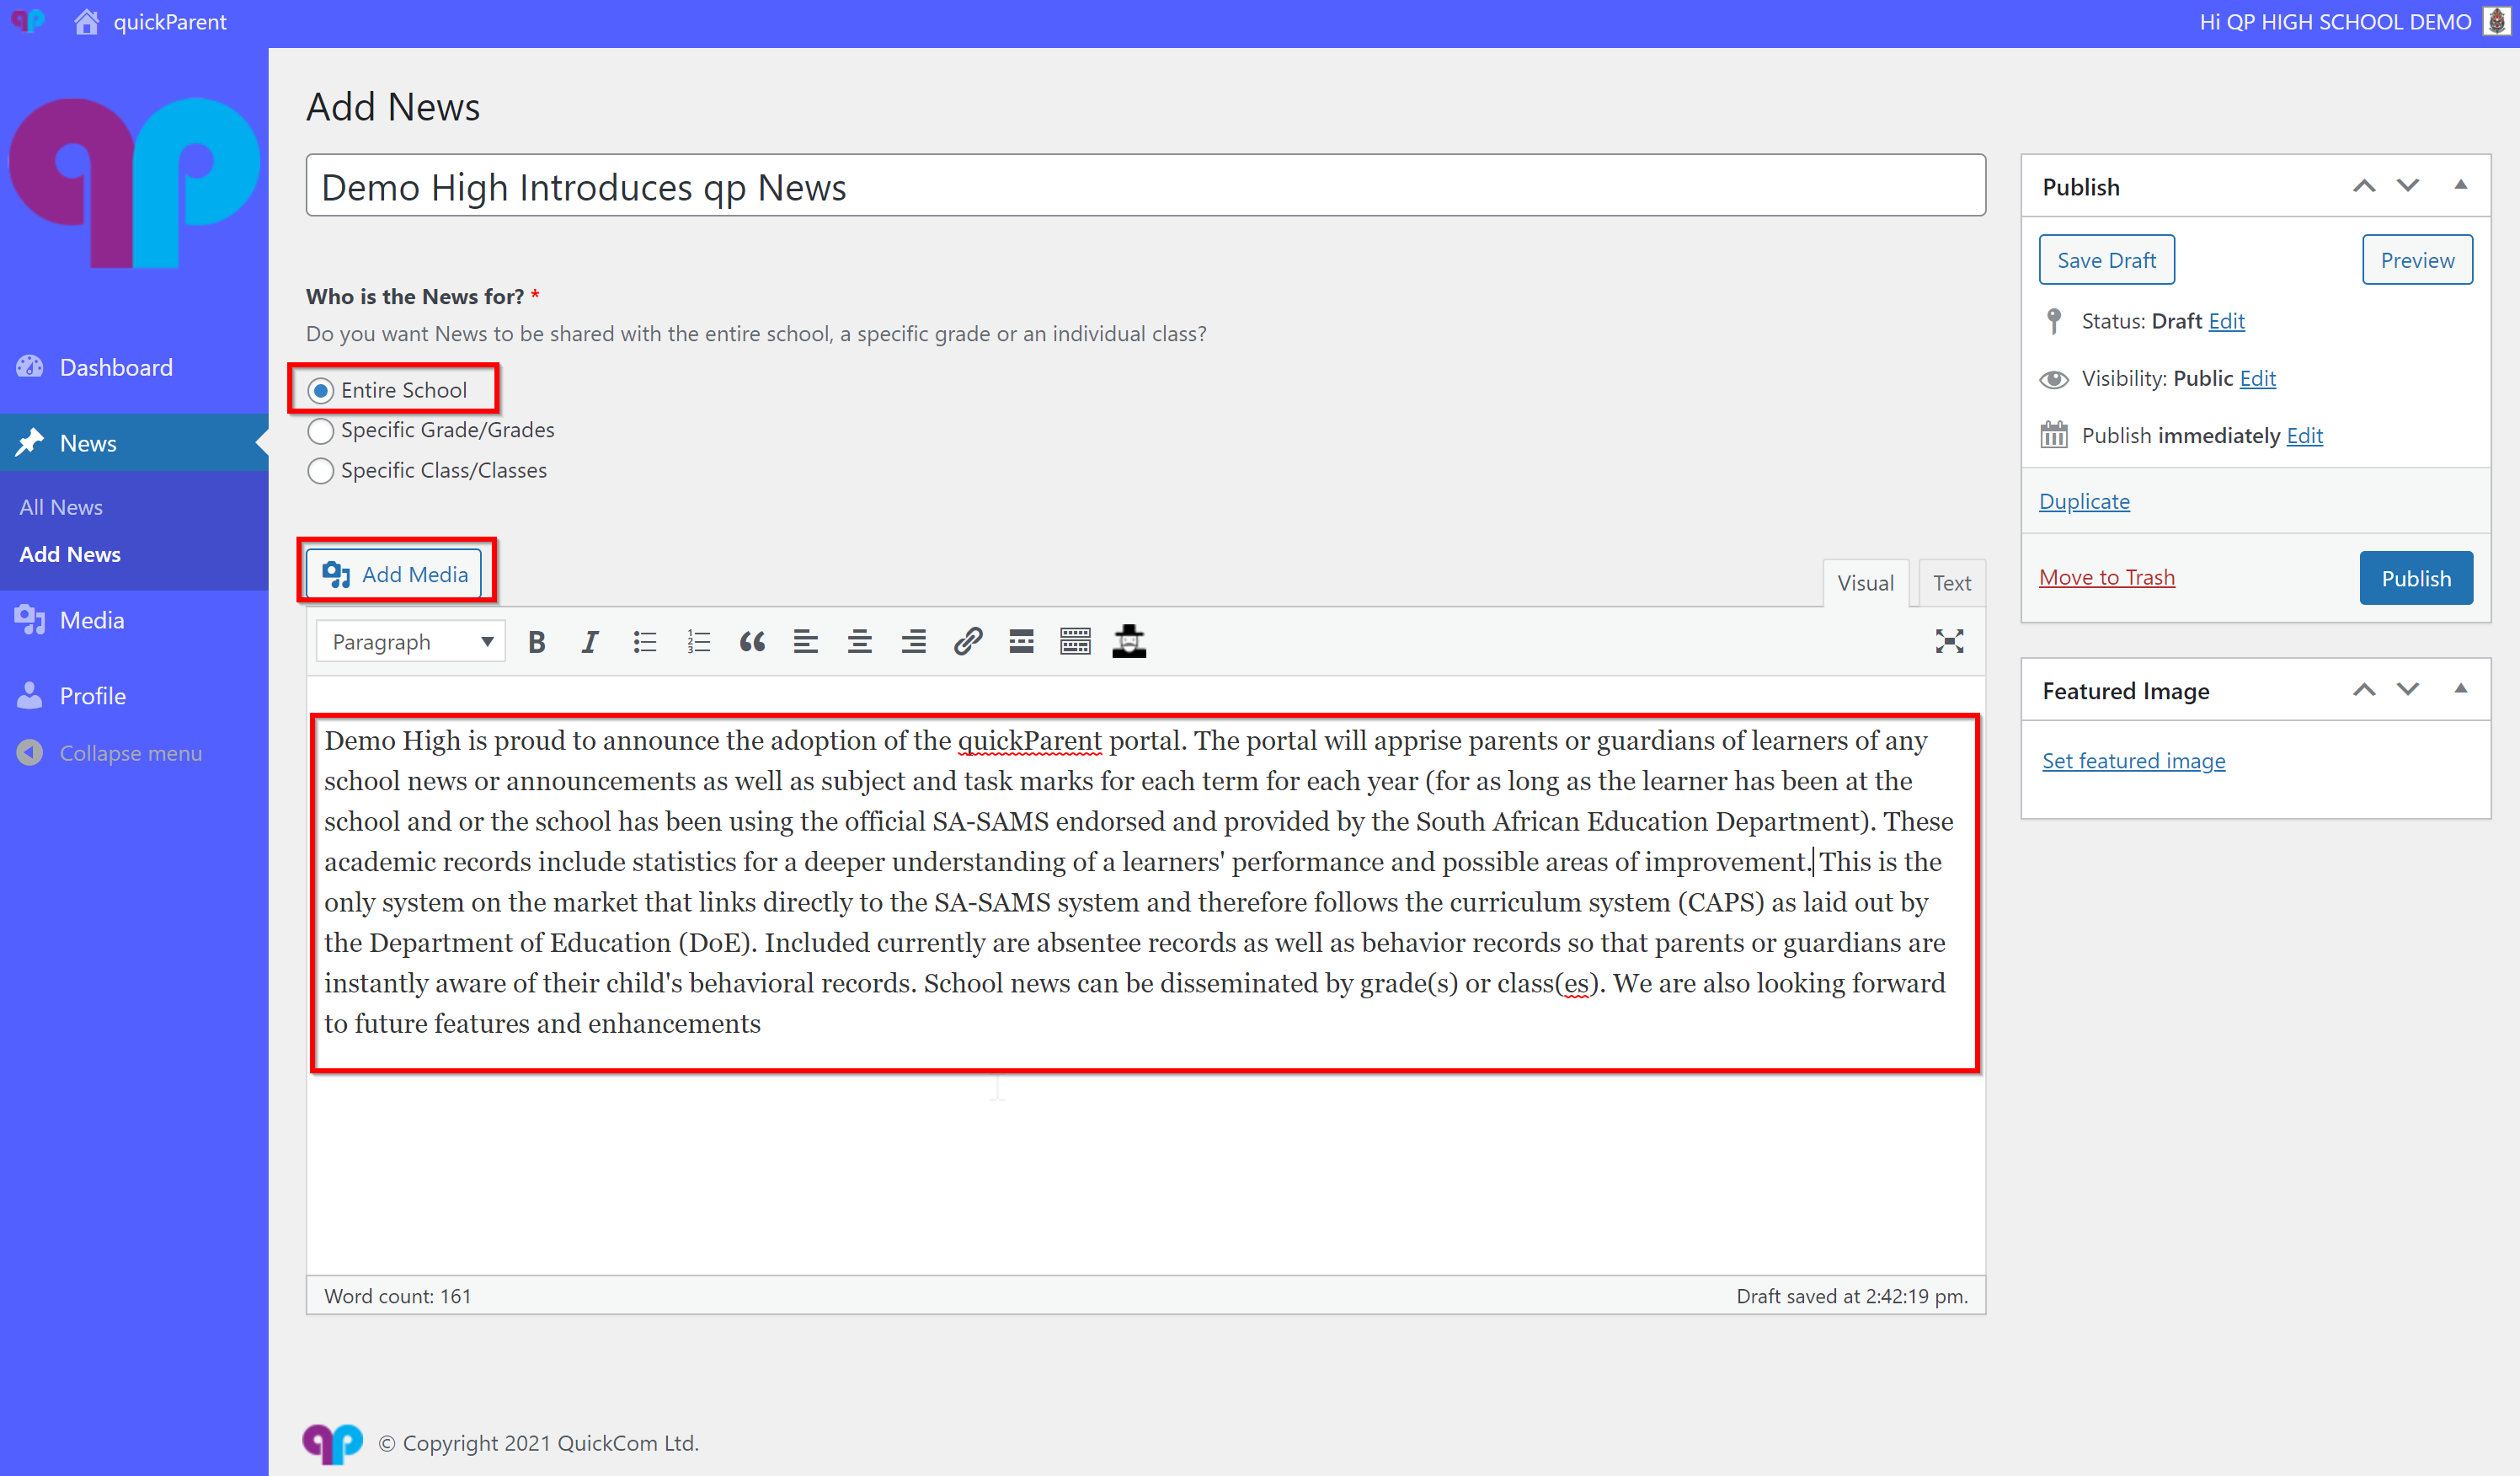
Type your article in the box provided then select the recipients of the article.
Expand Word Processing Tools
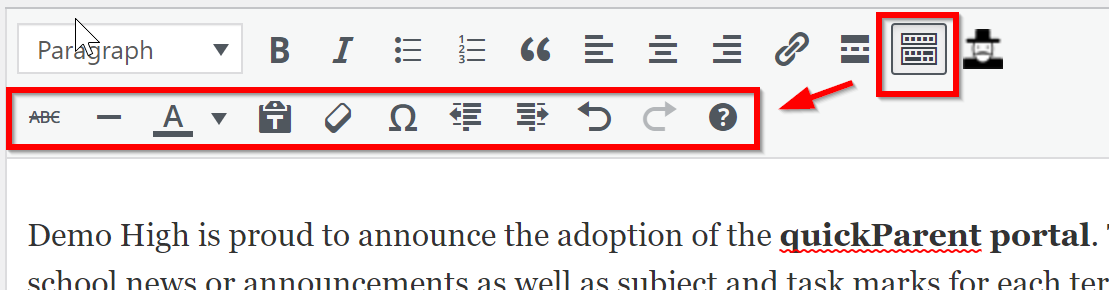
Click on the tool expansion icon as indicated above in order to have access to more word processing tools (for example Underline, strikethrough text or undo).
Using the word processing tools
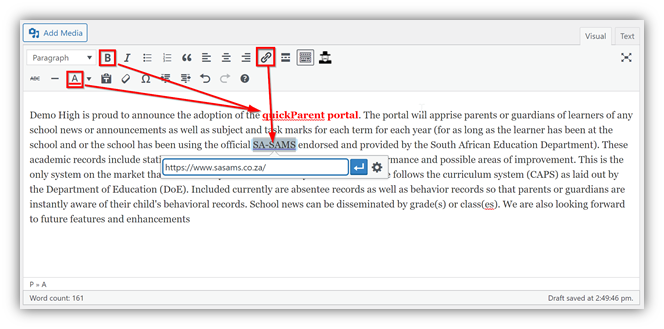
Use tools like Bold, Hyperlinks and Font Colour to enrich your document text for a more fulfilling and informative reading experience.
Distraction-Free Mode
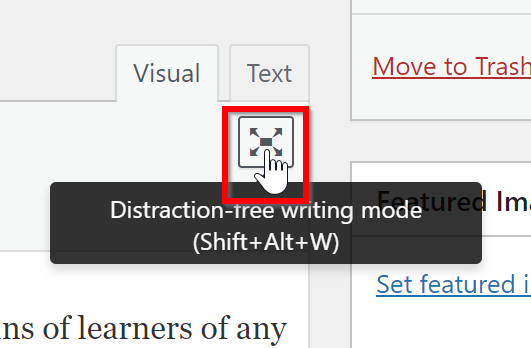
Click the distraction-free icon in order to edit your document without side panels:
Add Media
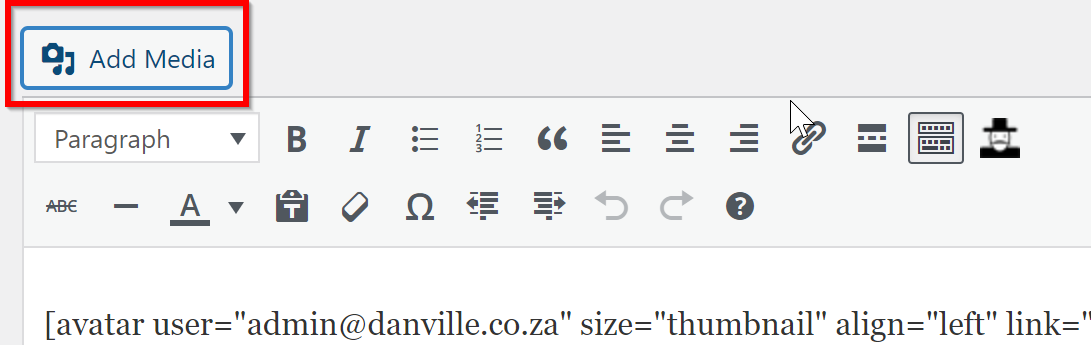
Click add media to add a picture to the article
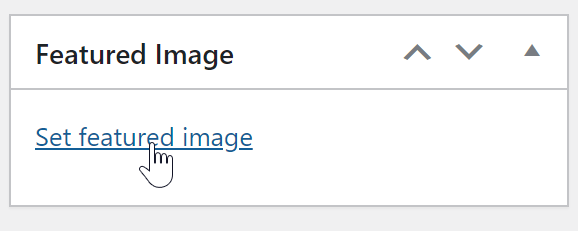
Click ‘Set Featured Image’
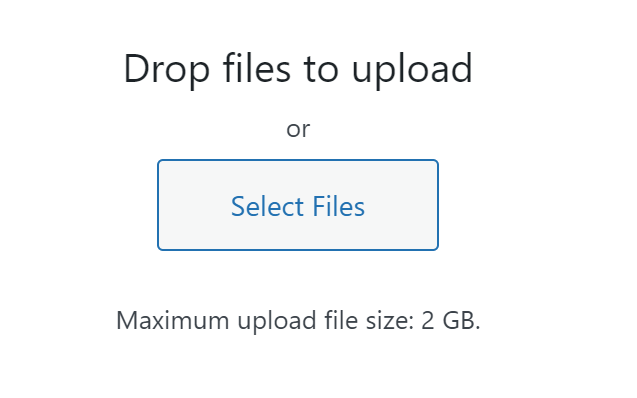
Drag an image or browse to an image in order to select it as the featured image.

Your featured image will now show in your Media Library
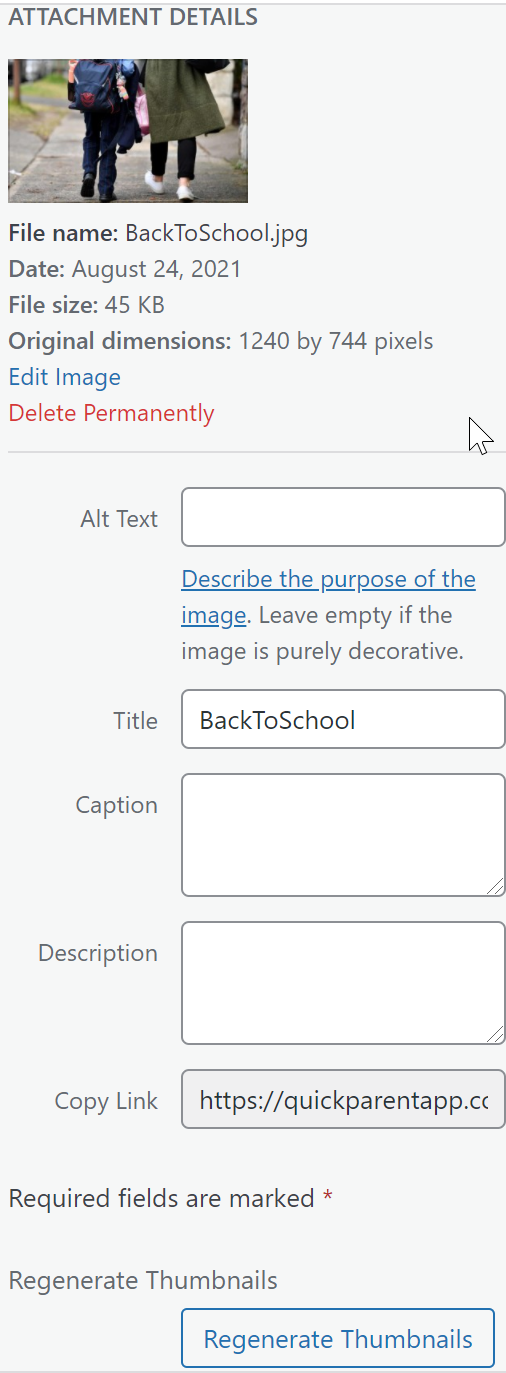
Alter any settings you may wish to add to the ariticle then click set featured image.

Note that if you ‘get lost’ then to return to the news article that you were drafting, click on the news/all news tab (notice the article you were working on, says draft as it was not published yet).
Preview
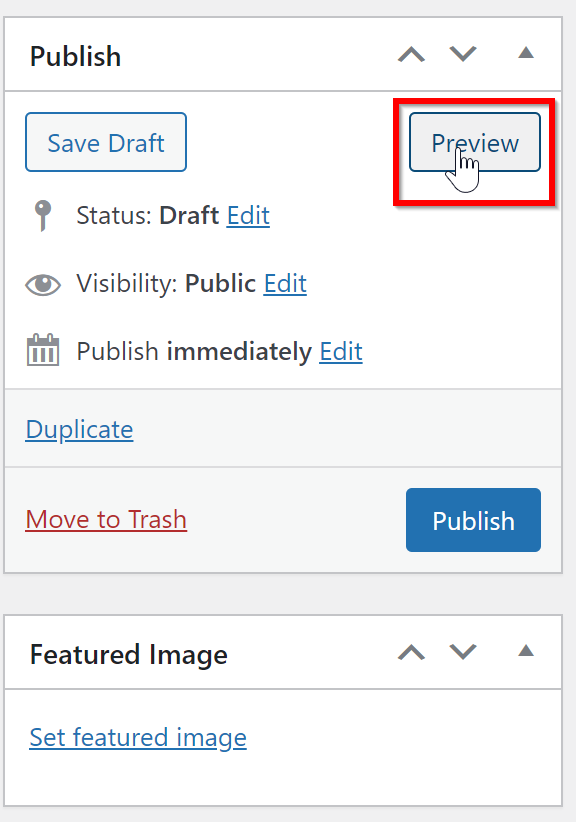 Save your article as a draft or preview the article.
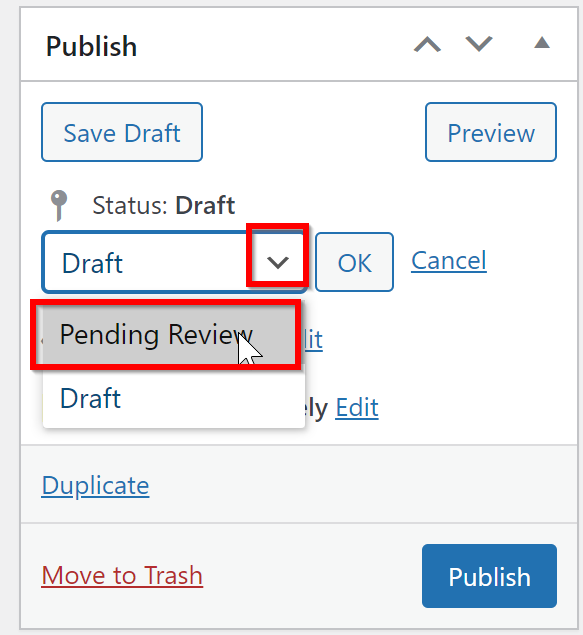
Pending Review
Elevate your draft copy to pending review during pre-release. Duplicate an older article for repeated or cyclical news. In order to deprecate an article click Move to Trash.
Password Protect Article
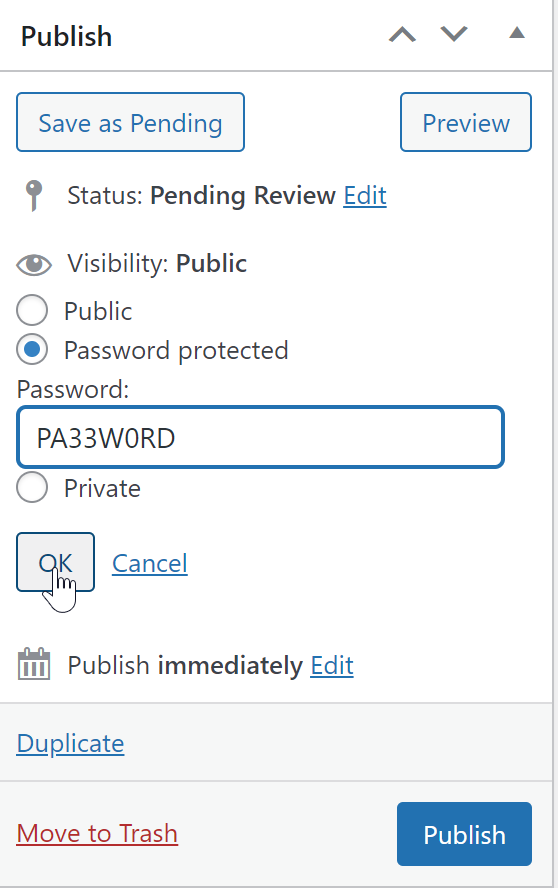
Password protect your article to prevent others from editing it.
Publish your article
 Select the status of the article and then click publish. If it is a draft then it will simply be stored for you to return to. If it is a Pending Review then the article will be stored until the relevant party reviews and approves the article
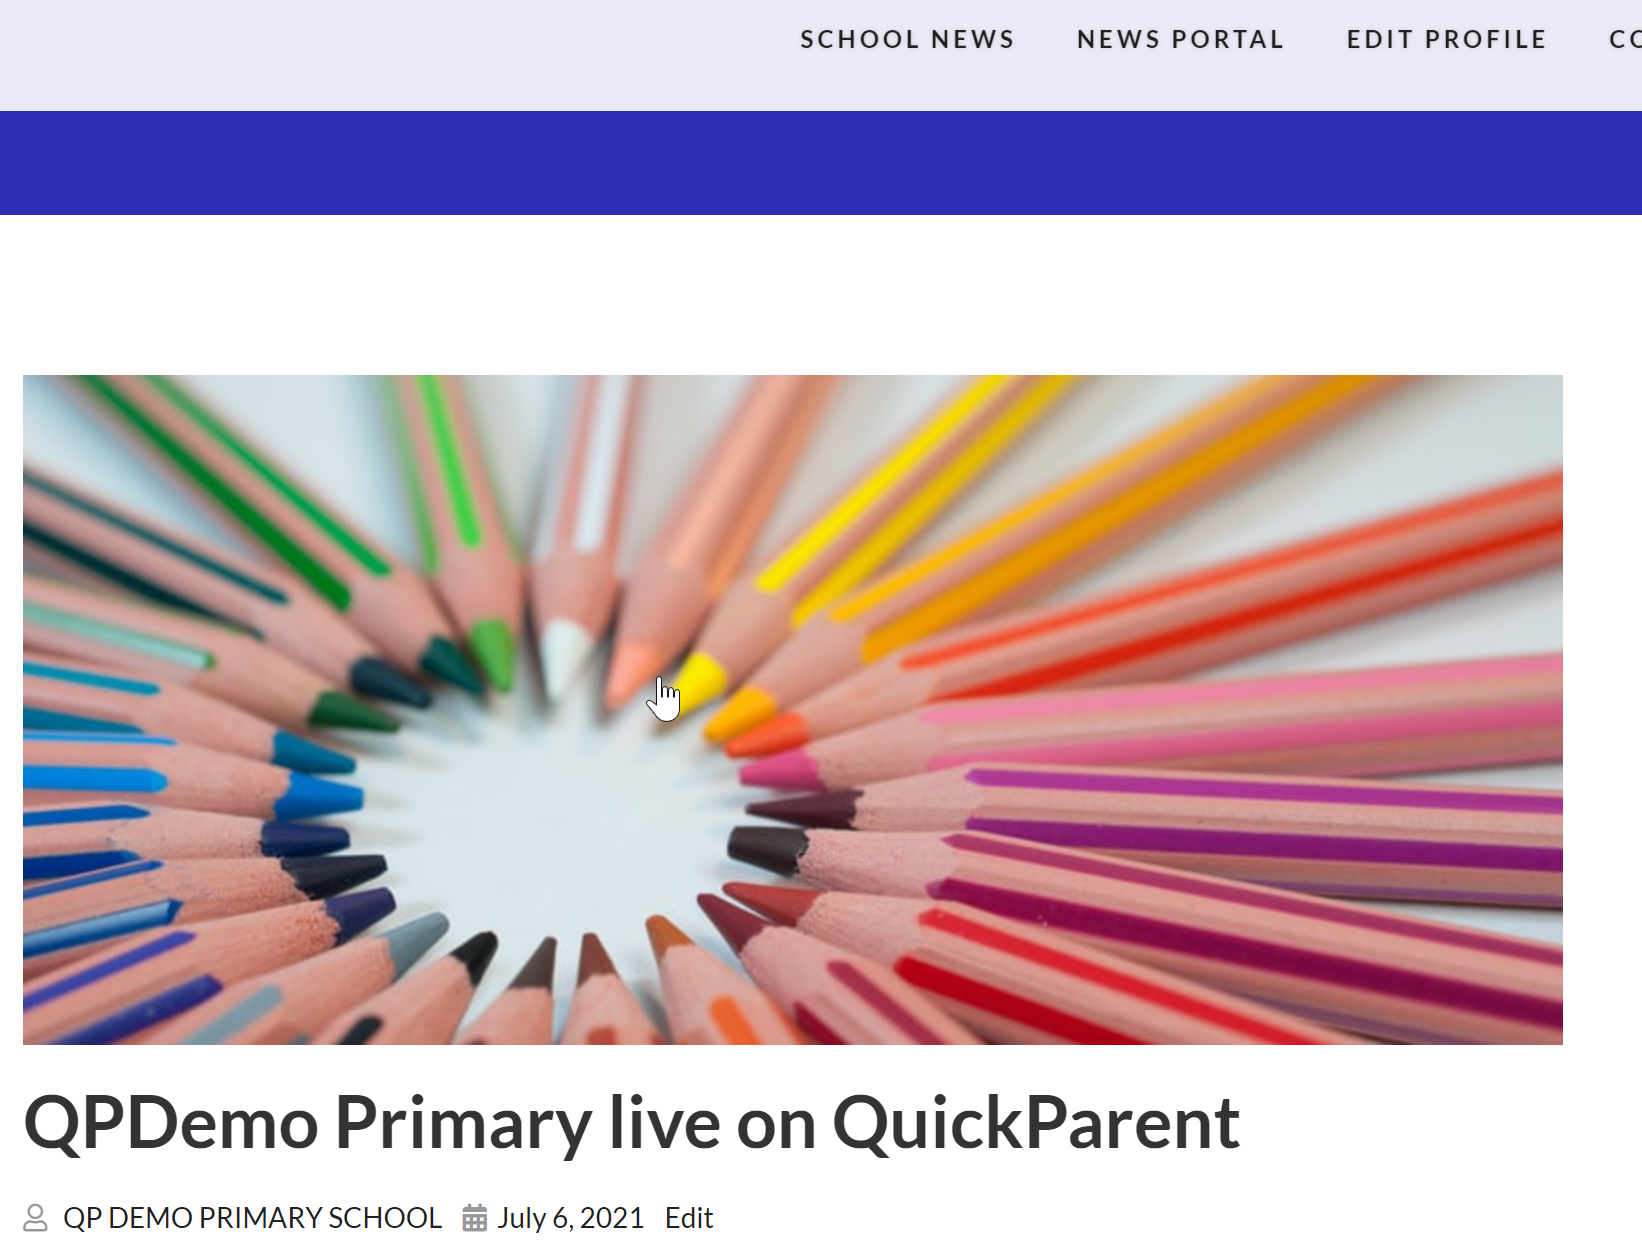
View Post
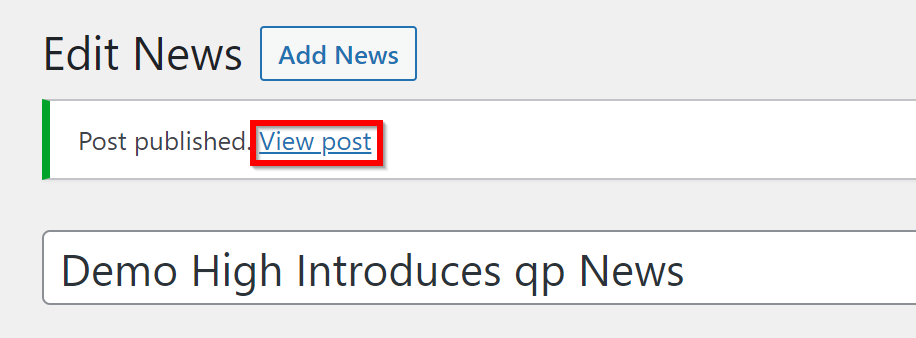
Click view post once you have published your article in order to view it.

Edit Profile
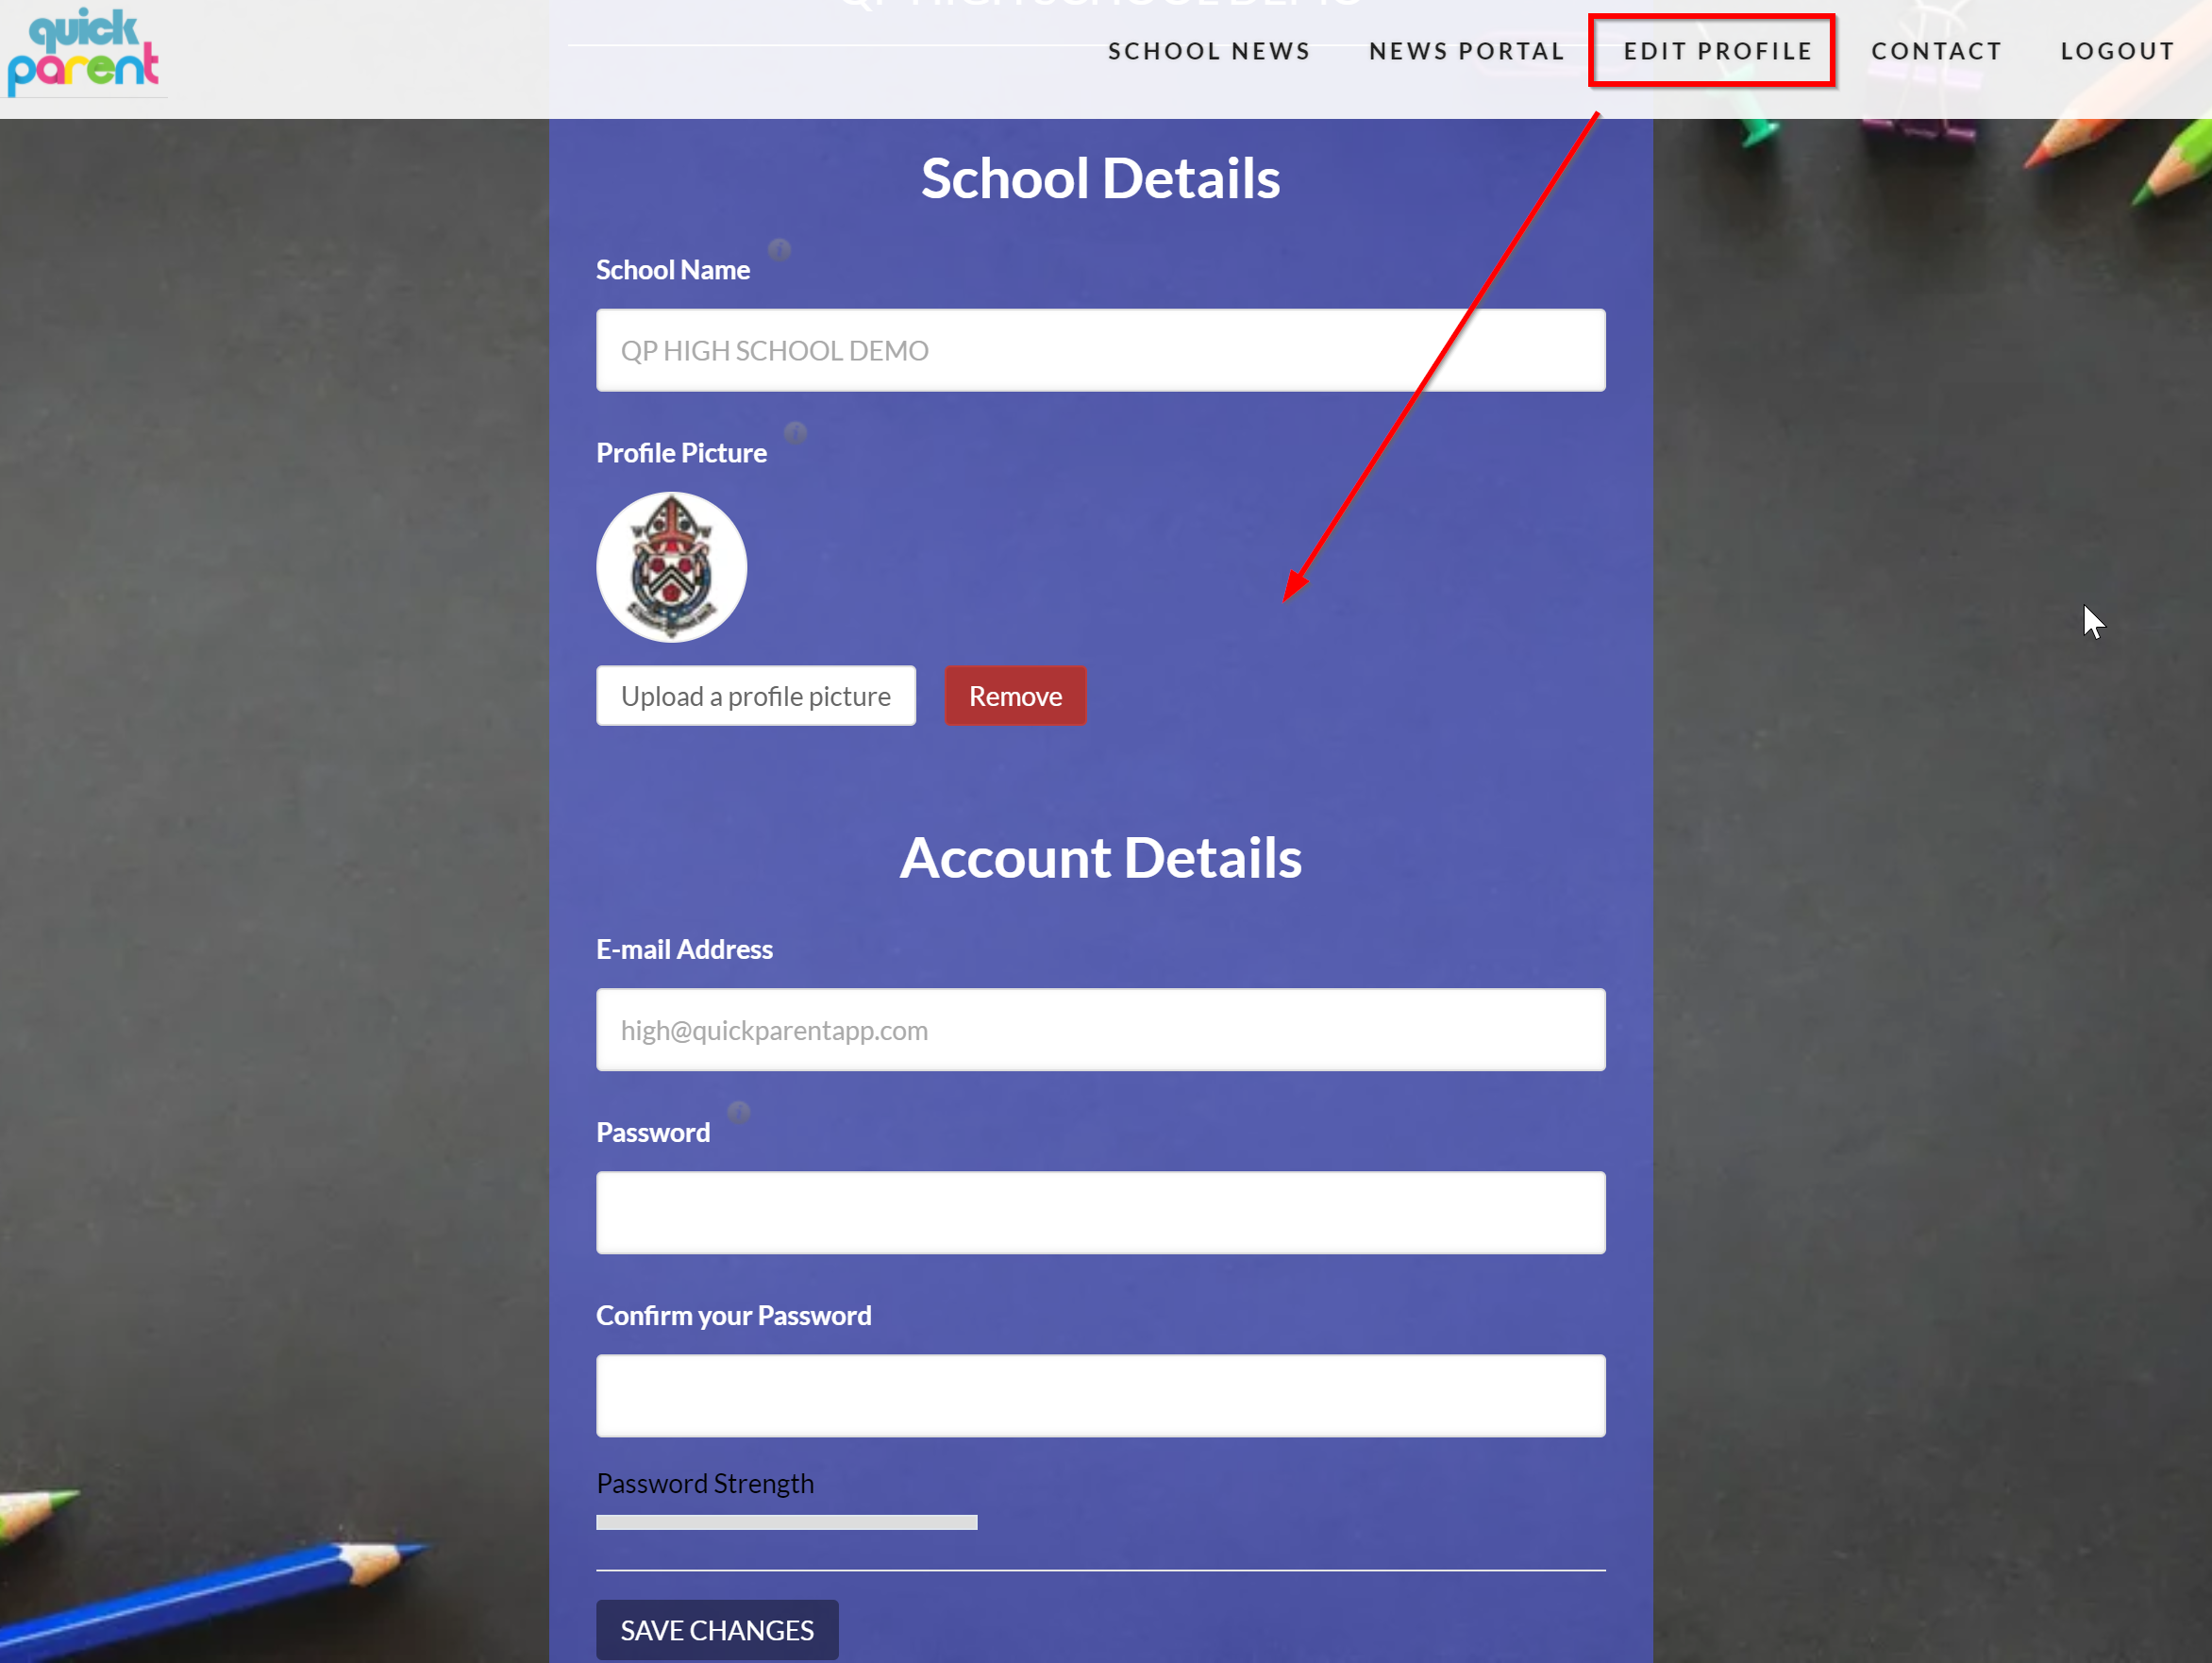
Upload your profile picture (ordinarily your school badge). The School Name and E-mail Address are automatically picked up from the upload of school information in the export of school data via the quickParent Electron App (qpEA).
Click Save Changes for any changes you may have made.
3 quickParent App (Mobile)
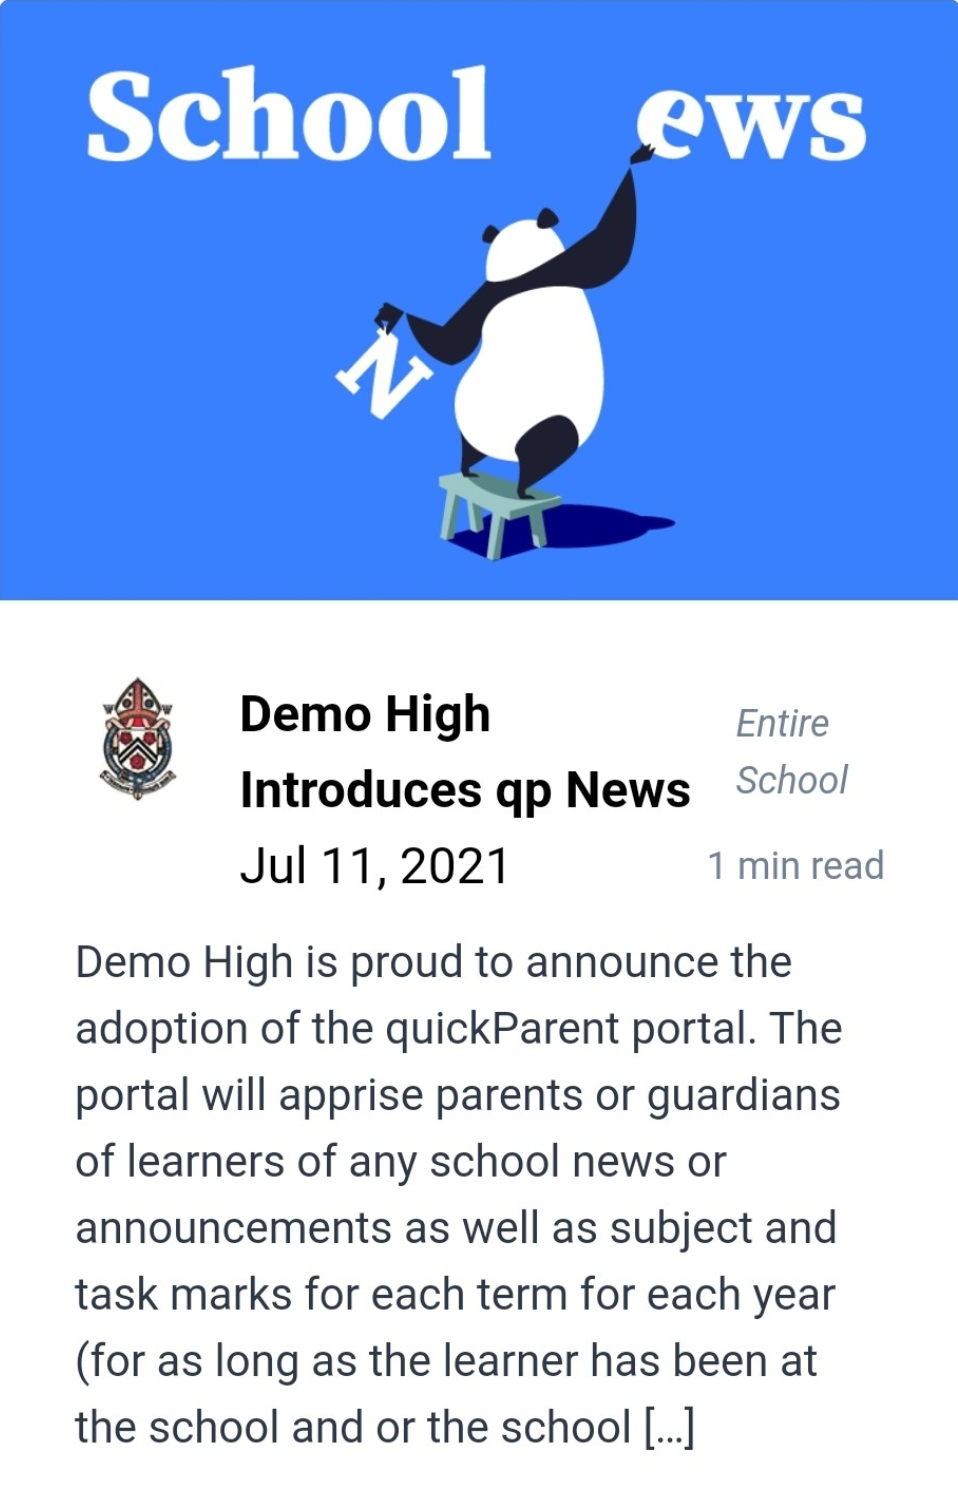
Once a news article is created and posted from the schools news portal, parents will receive a push notification on their phones alerting them of the news which can be viewed via the quickParent mobile app.
There they can also see all of the learner’s task marks other elements of data concerning their school life. Please see the qp Mobile manual for notes on this.